Ever pondered on the flawless segue from the lively summer hues to the serene autumn tones for your nails? With the shifting seasons comes a transformation in our mood and fashion sense. Join us in discovering a collection of stunning end-of-summer nail designs that not only pay homage to the departing summer but also offer a glimpse into the impending fall color palette. Are you prepared to immerse yourself in a realm where colors, patterns, and nail styles harmonize to craft artistic expressions at your fingertips?
Advertisement
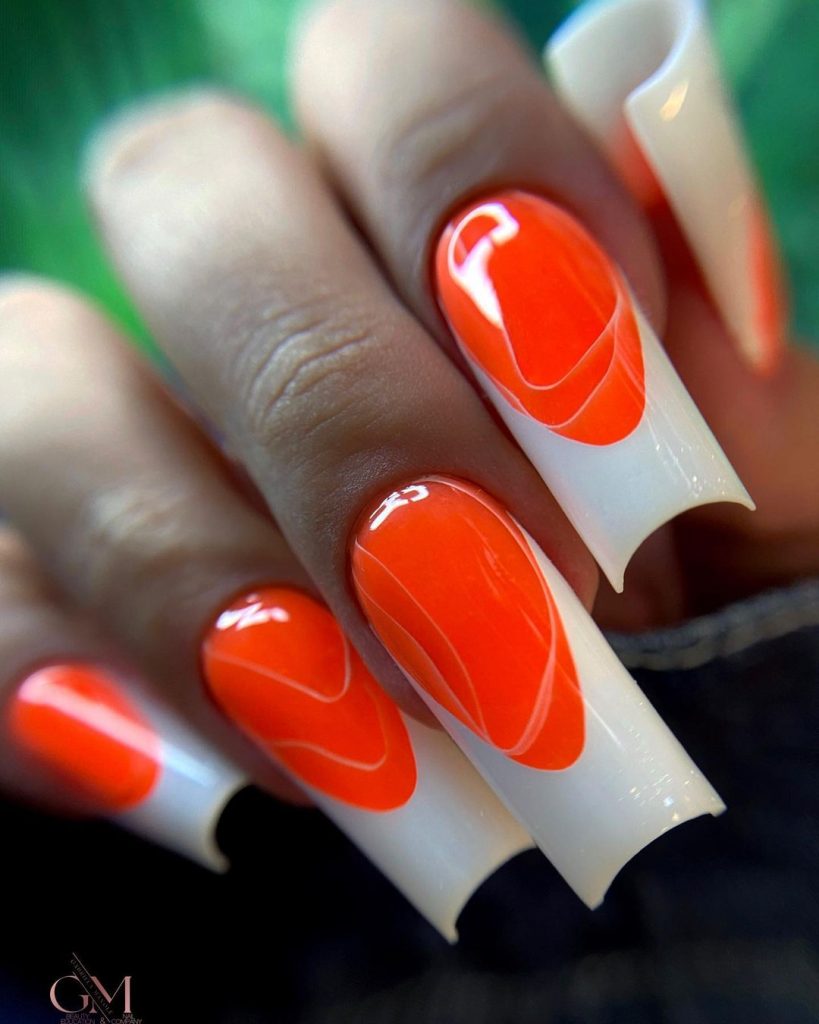
Flaming Orange Swirls
This fiery design combines swirling orange patterns on a white base, evoking the warm and vibrant energy of summer sunsets. The dynamic swirls are playful yet elegant, perfect for those who love bright, colorful nails.
Consumables List
- Base Coat: Revlon Quick Dry
- White Polish: OPI Alpine Snow
- Orange Polish: Sally Hansen’s Sun Kissed
- Detailing Brush: For intricate swirls
- Top Coat: Seche Vite Dry Fast
- Recommendations: Practice the swirl designs on paper before attempting on nails to ensure smooth, confident strokes.
DIY Instructions
Start with a base coat to protect your nails. Apply a white polish as the base color. Using a detailing brush, draw swirls with an orange polish starting from the nail bed to the tip. Allow each design to dry thoroughly to prevent smudging. Finish with a glossy top coat to enhance the details and longevity.
Advertisement
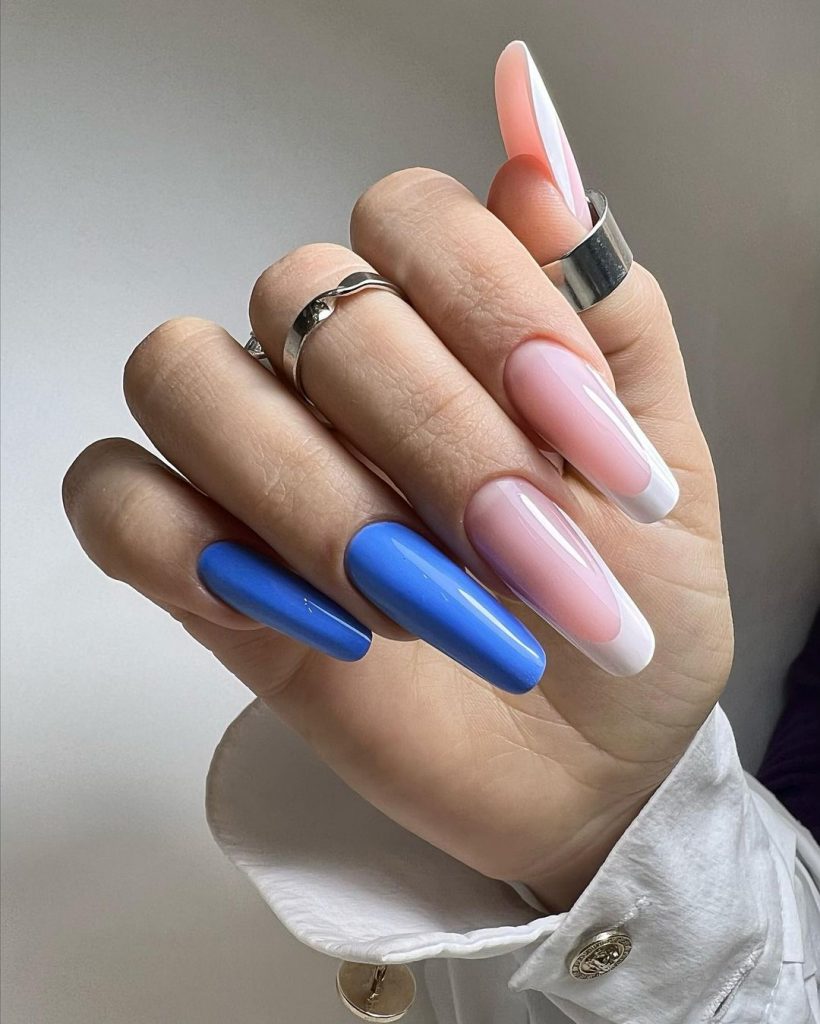
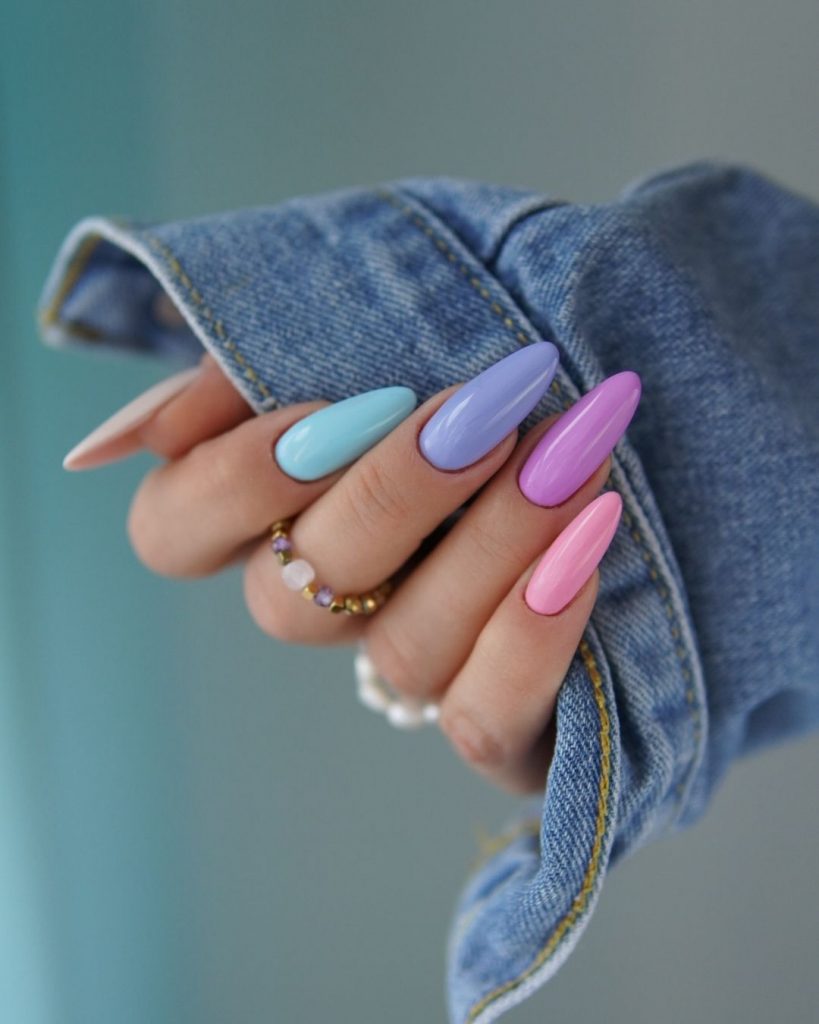
Sleek Pastel Almond Fusion
The nails in this image are a modern marvel of manicure artistry, perfect for signaling the waning days of summer. Featuring an almond-shaped design that combines a delicate gradient of pastel pink and peach with striking solid blue, this set exudes a fresh, breezy feel while hinting at the upcoming autumnal tones.
Consumables List
- Base Coat: OPI Natural Base
- Pastel Pink Polish: Essie’s Fiji
- Peach Polish: China Glaze’s Peachy Keen
- Solid Blue Polish: Sally Hansen’s Pacific Blue
- Top Coat: Seche Vite Dry Fast
- Recommendations: Achieve the gradient by using a makeup sponge to softly dab and blend the pastel colors on the nail.
DIY Instructions
Begin with a clean, prepped nail and apply a base coat. Paint a base of pastel pink and while still slightly tacky, use a sponge to apply peach towards the nail tips, blending gently. For the accent nail, apply two coats of solid blue. Finish with a high-gloss top coat to seal in the design and add durability.
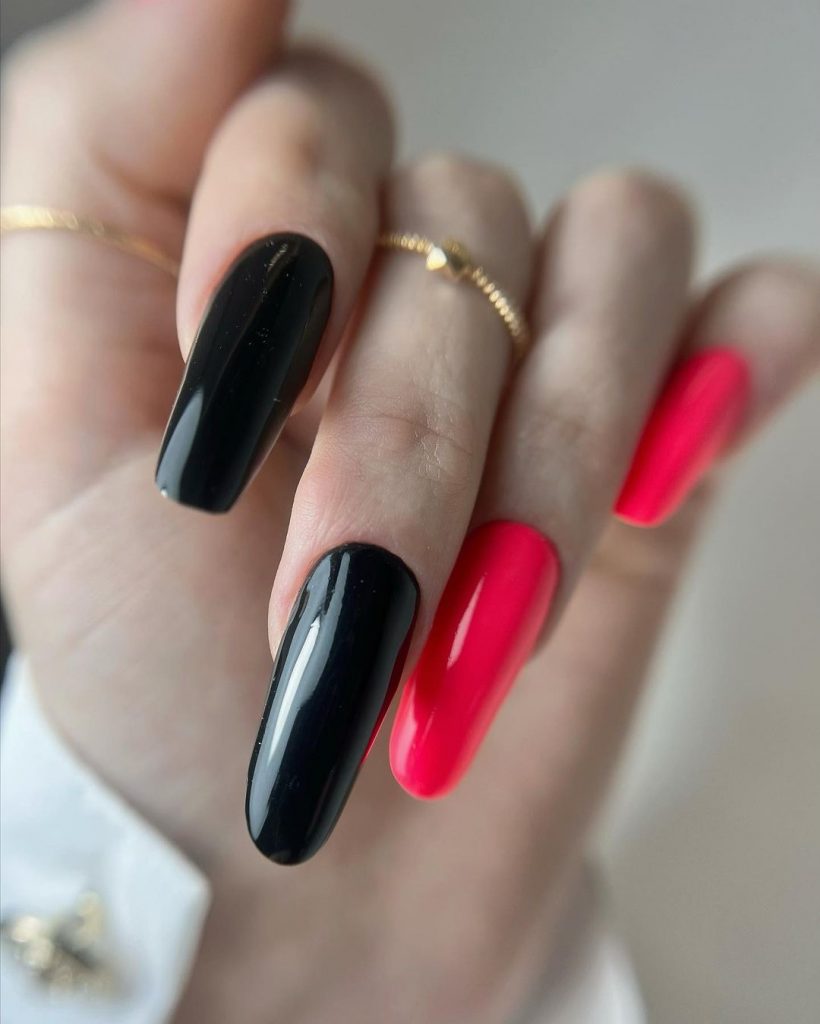
Bold Contrast with Classic Elegance
This nail design marries boldness with classic sophistication. The juxtaposition of deep black against vibrant red creates a visually striking effect that’s both trendy and timeless, embodying the passion of summer with the depth of darker seasons.
Consumables List
- Base Coat: Revlon Quick Dry Base Coat
- Black Polish: OPI Black Onyx
- Red Polish: Essie’s Really Red
- Top Coat: Seche Vite Dry Fast Top Coat
- Recommendations: For a flawless finish, apply the black and red polish with careful precision using a fine brush along the edges.
DIY Instructions
Apply a base coat to protect the nail. Paint the nails alternately with black and red polish, allowing each coat to dry completely. Use a fine brush to clean up the edges for a sharp, professional look. Finish with a fast-drying top coat to enhance shine and longevity.
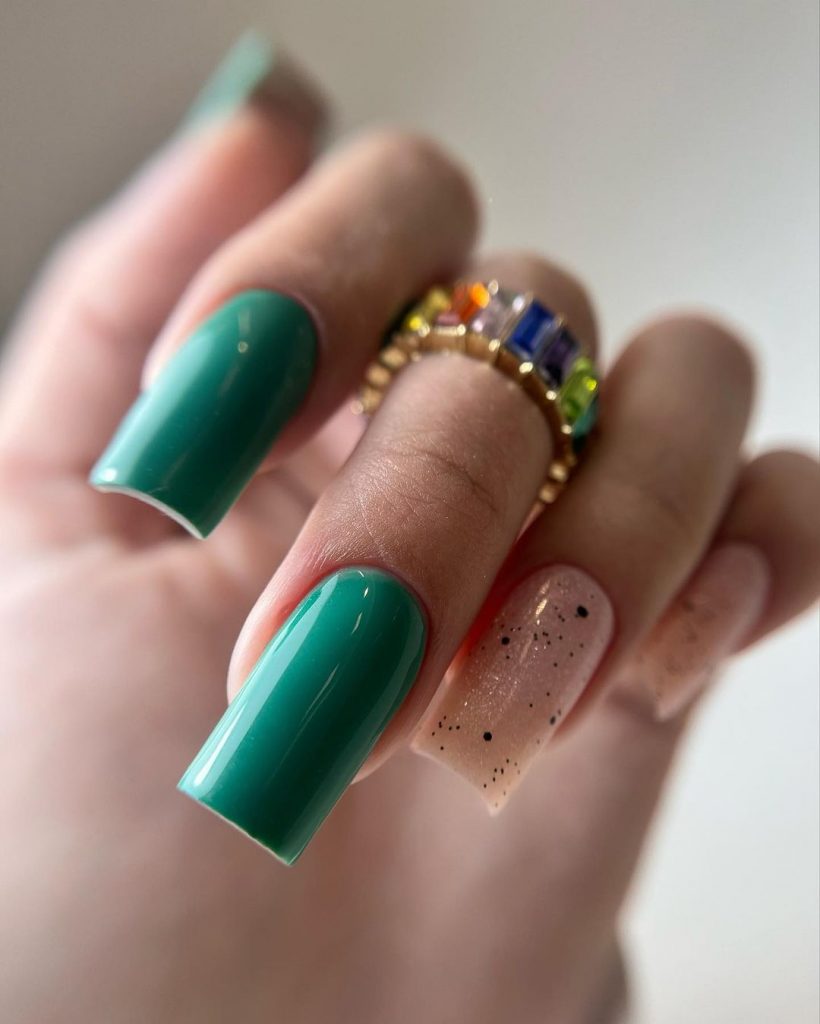
Tropical Teal and Sparkling Sand
Capturing the essence of a tropical getaway, these nails feature a vibrant teal combined with a sandy glitter accent. This design is perfect for those clinging to the final days of summer, providing a splash of color and sparkle.
Consumables List
- Base Coat: CND Stickey Base Coat
- Teal Polish: Essie’s Trophy Wife
- Glitter Polish: OPI’s You Don’t Know Jacques!
- Top Coat: Seche Vite Dry Fast
- Recommendations: Apply glitter polish using a dabbing motion to concentrate the sparkle towards the nail tips.
DIY Instructions
Start with a base coat to protect your nails. Apply two coats of teal polish as the base. For the accent nail, apply a base color similar to the sandy glitter and then dab the glitter polish on, focusing towards the tip. Seal with a top coat for a sparkling finish.
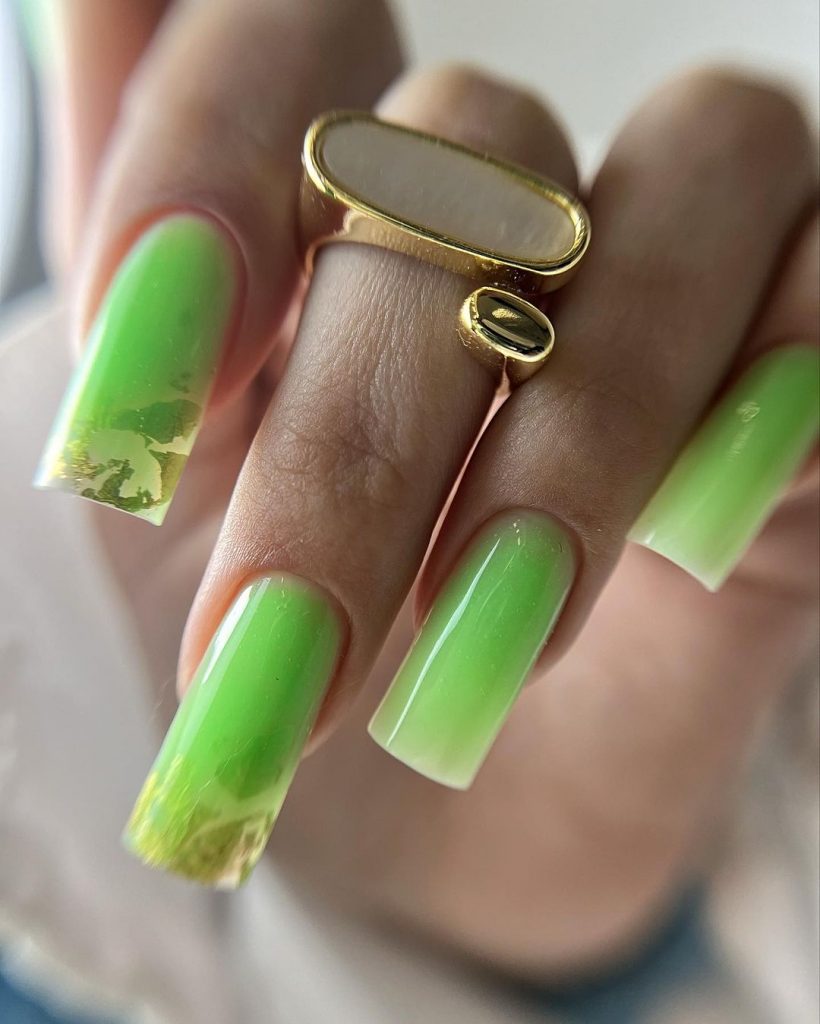
Neon Ombre Dreams
This nail design is a vibrant statement piece, perfect for those who love to stand out. The bright neon green fades into a gentle yellow, reminiscent of a citrus-infused summer drink, making it a perfect match for end of summer nails.
Advertisement
Consumables List
- Base Coat: Sally Hansen Double Duty
- Neon Green Polish: China Glaze’s Lime After Lime
- Yellow Polish: OPI’s Need Sunglasses?
- Sponge: For the ombre effect
- Top Coat: Seche Vite Dry Fast
- Recommendations: Utilize a sponge to blend the green and yellow polishes smoothly on the nail.
DIY Instructions
Apply a base coat to protect your nails. Use neon green as your base color. Apply yellow polish to a sponge and dab gently from the midpoint of the nail to the tip, blending into the green. Repeat for intensity. Finish with a top coat for a glossy, vibrant look.
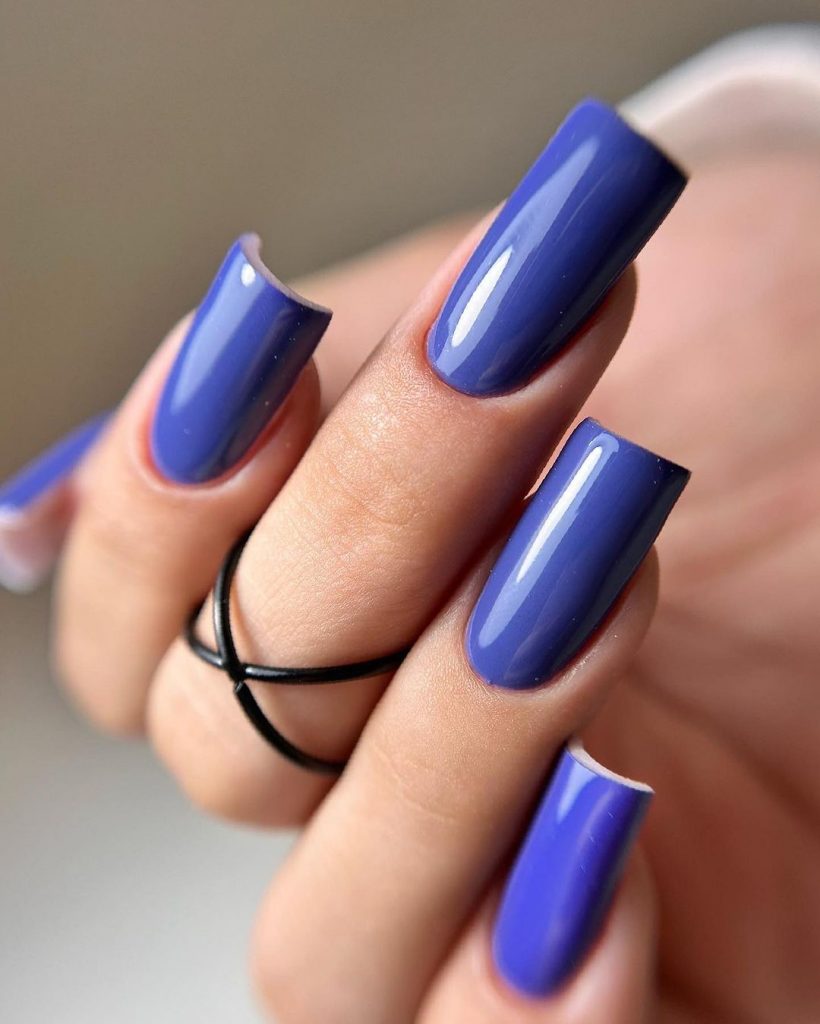
Sophisticated Blue Elegance
Reflecting the deep hues of an evening sky, this nail design utilizes a sophisticated deep blue, ideal for transitioning into the cooler, more subdued days of fall. The glossy finish enhances the luxurious depth of the color, making it a chic, simple yet profound statement.
Consumables List
- Base Coat: OPI Natural Base
- Deep Blue Polish: Essie’s After School Boy Blazer
- Top Coat: Seche Vite Dry Fast
- Recommendations: For an extra glossy finish, apply multiple layers of top coat, allowing each to dry thoroughly.
DIY Instructions
Start with a base coat to protect the nail. Apply two to three coats of deep blue polish, allowing each layer to dry completely. For added shine, apply several layers of top coat, ensuring each is dry before the next application. This will provide both a deep shine and a durable finish.
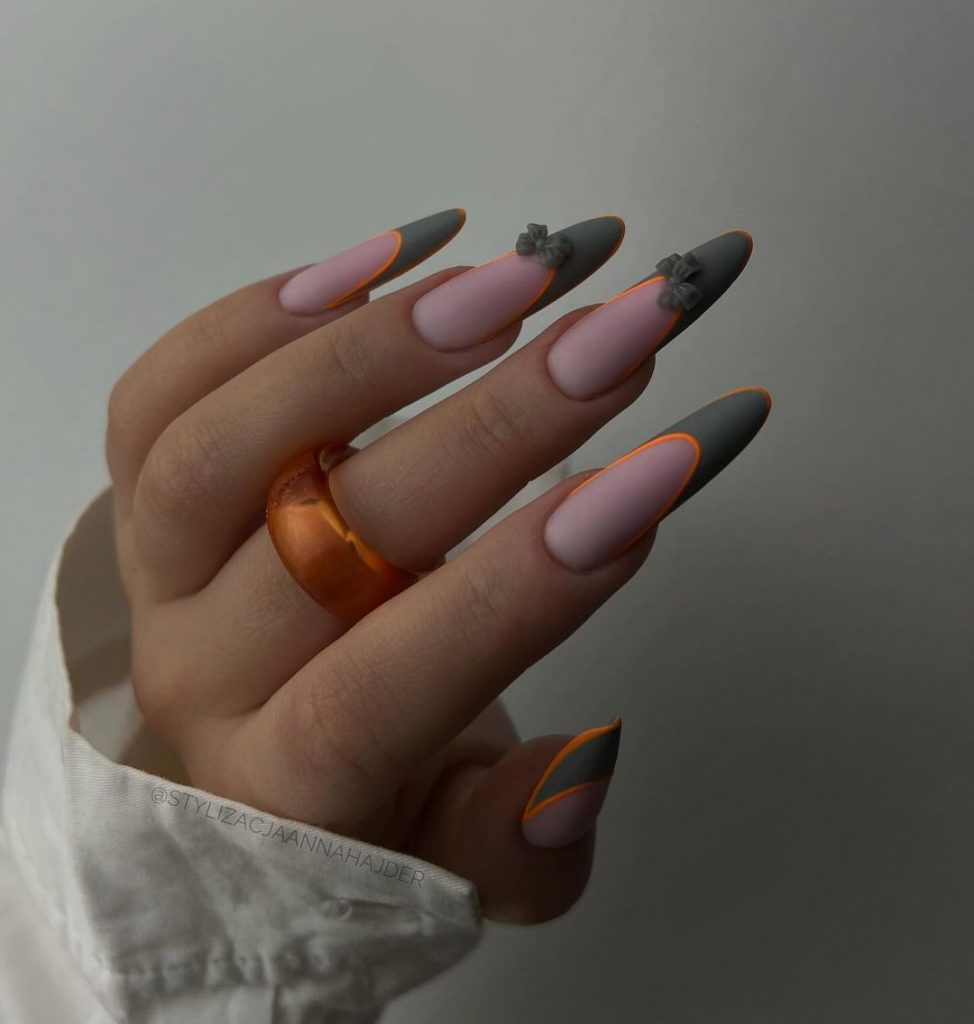
Elegant Monochrome with a Twist
The nail design displayed here brilliantly combines understated elegance with playful creativity. The matte gray and pastel pink create a soothing palette, while the sharp orange lines add a dynamic twist. This look is punctuated with small gray bows, offering a quaint yet modern feel, ideal for transitioning from the lively summer to a more subdued fall mood.
Consumables List
- Base Coat: Essie’s First Base
- Matte Gray Polish: OPI’s Cement the Deal
- Pastel Pink Polish: Essie’s Muchi, Muchi
- Orange Striping Tape
- Matte Top Coat: Matte About You by Essie
- Recommendations: Use striping tape for precise and clean orange lines, ensuring they pop against the muted background.
DIY Instructions
Start with a base coat to protect your nails. Apply two coats of matte gray on all nails, followed by a band of pastel pink on selected nails for contrast. Once dry, apply orange striping tape for the sharp lines. Add small bows on the ring fingers using nail glue. Finish with a matte top coat for a cohesive look.
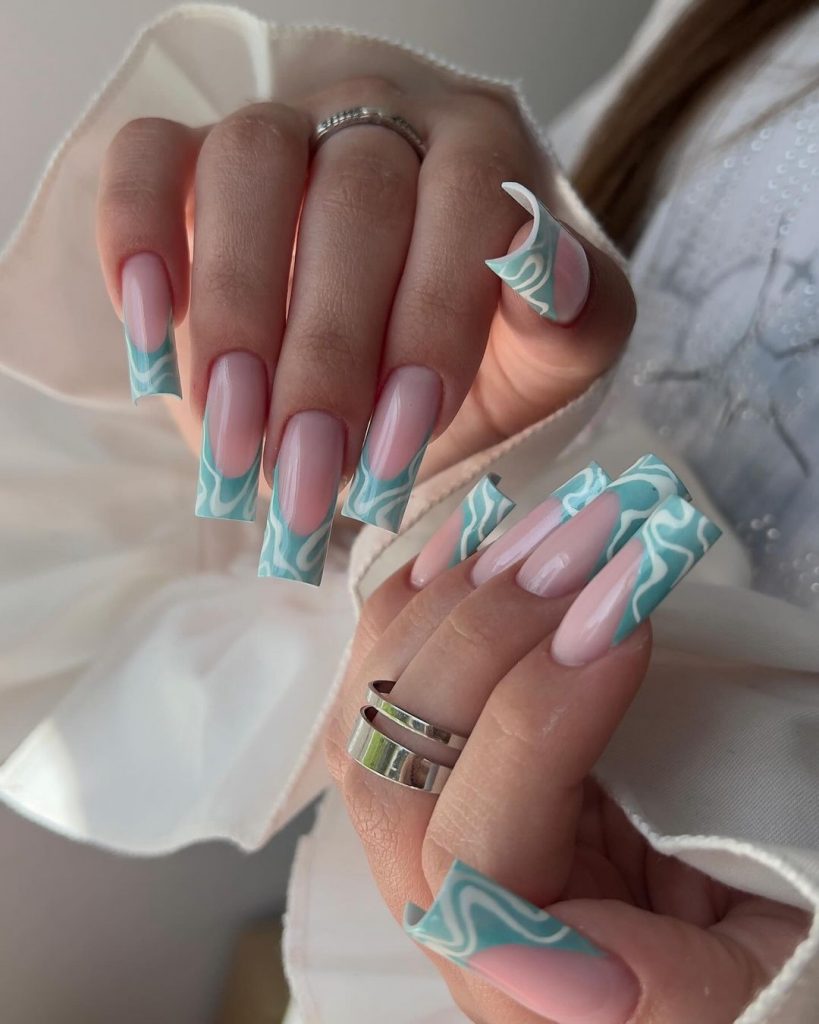
Tranquil Ocean Swirls
This manicure captures the serene flow of ocean waves with a swirled turquoise and white design. The nails are artistically done to reflect the gentle undulations of water, making it a perfect end of summer nails look that brings a piece of the beach to your fingertips.
Consumables List
- Base Coat: Sally Hansen Double Duty
- Turquoise Polish: China Glaze’s Too Yacht to Handle
- White Polish: OPI’s Alpine Snow
- Swirl Tool or Toothpick
- Top Coat: Seche Vite Dry Fast
- Recommendations: Swirl the turquoise and white while still wet to achieve the perfect marbled effect.
DIY Instructions
Apply a base coat to protect the nails. Paint a white base and while still wet, add drops of turquoise. Use a swirl tool or toothpick to gently drag and swirl the colors together, creating a wavy pattern. Seal the design with a top coat for lasting shine and protection.
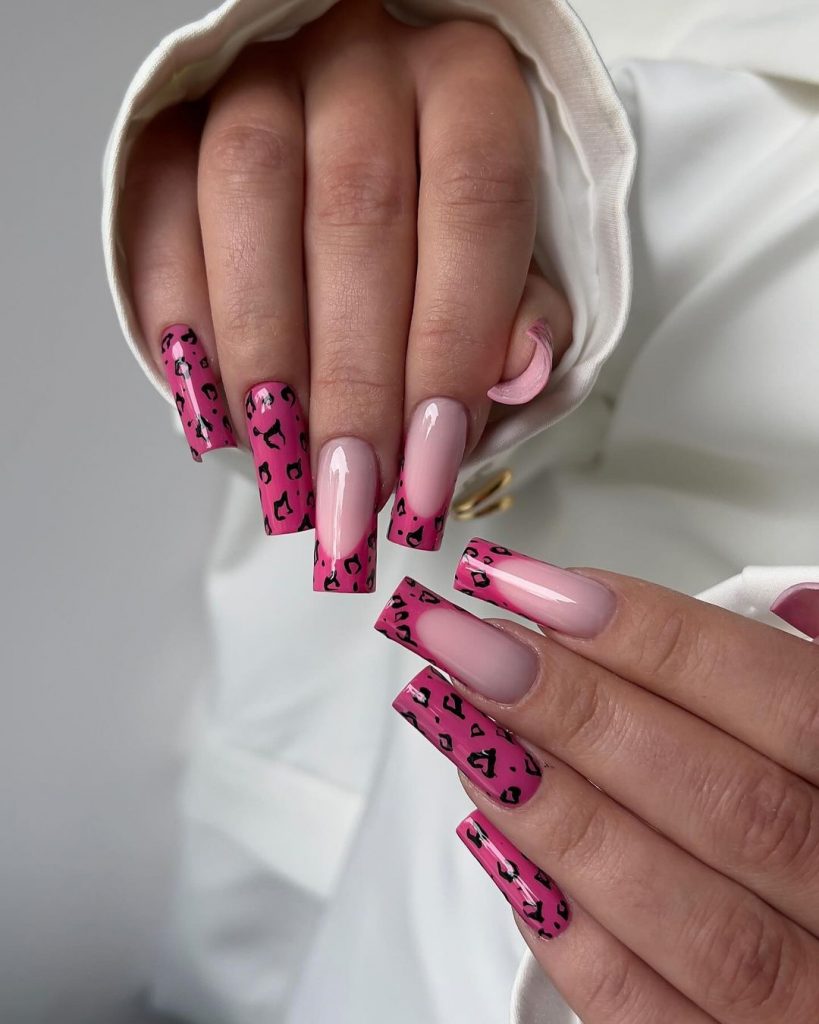
Playful Pink Leopard Print
Embrace your wild side with these bold, pink leopard print nails. The vibrant pink base paired with black and hot pink spots creates a striking look that’s both fun and fashionable. This design is a fabulous way to add a pop of color and personality to any ensemble.
Consumables List
- Base Coat: OPI Natural Base Coat
- Pink Polish: Essie’s Fiesta
- Black Polish: OPI Black Onyx
- Dotting Tool
- Top Coat: Seche Vite Dry Fast
- Recommendations: Use a dotting tool for precise spot application, and don’t overthink the placement—irregular patterns mimic natural leopard spots.
DIY Instructions
Start with a base coat to protect your nails. Apply a light pink polish as the base. Use a dotting tool to add small black spots randomly over the nail. Add additional pink spots inside the black to enhance the leopard effect. Finish with a glossy top coat for durability and shine.
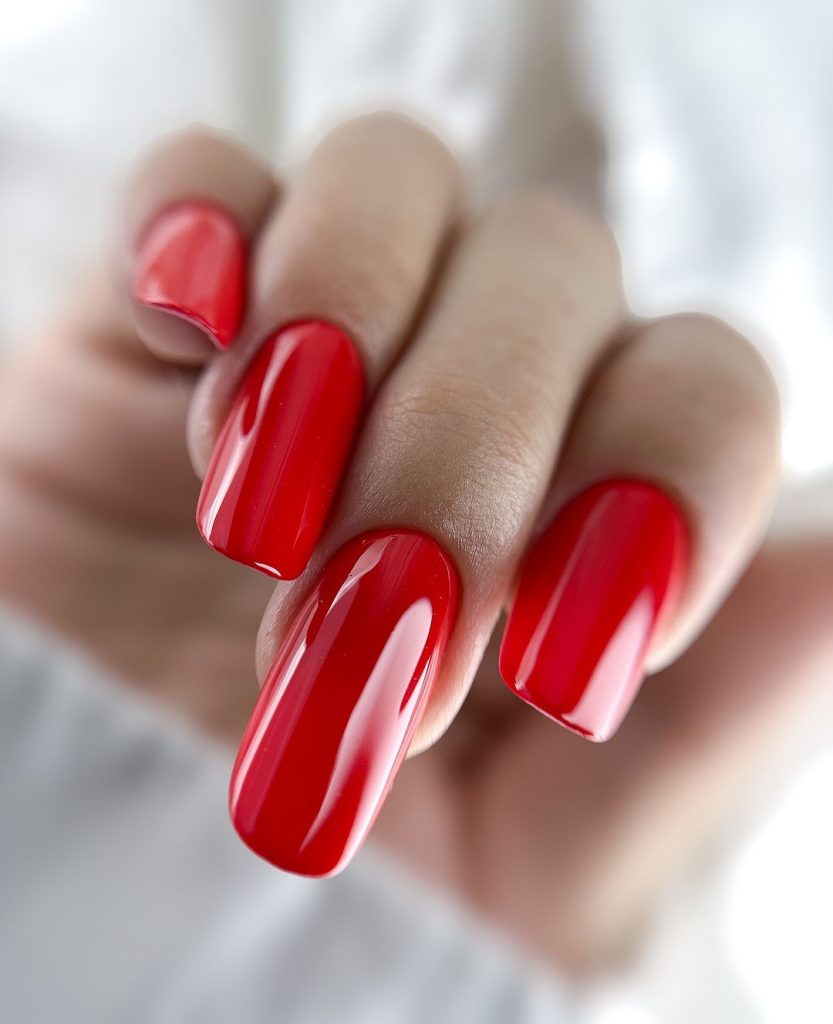
Classic Red Sophistication
Nothing says timeless elegance like a set of perfectly polished red nails. This look uses a bright red that’s both eye-catching and sophisticated, making it a versatile choice that transitions beautifully from day to night.
Consumables List
- Base Coat: Essie’s Here to Stay
- Red Polish: Essie’s Really Red
- Top Coat: Seche Vite Dry Fast
- Recommendations: Apply thin, even layers to achieve a smooth, glossy finish without bubbles.
DIY Instructions
Apply a base coat to protect your nails. Paint two coats of red polish, letting each layer dry thoroughly. Apply a top coat for a smooth, high-gloss finish that will last for days.
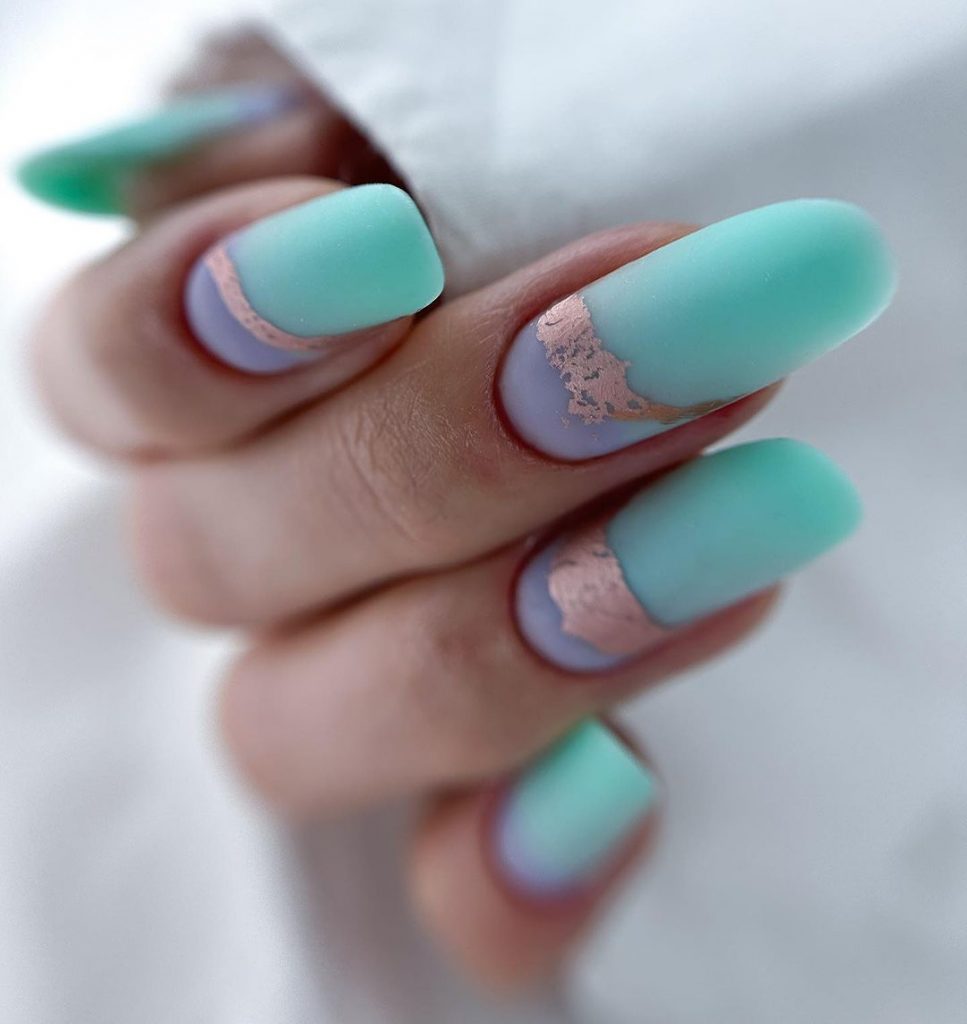
Pastel Dreams with Metallic Accents
This design blends soft pastel tones with bold metallic copper accents in a unique way that’s perfect for signaling the end of summer. The soft green and purple pastels provide a gentle background, while the metallic accents give it a modern edge.
Consumables List
- Base Coat: OPI Natural Base
- Pastel Green Polish: Essie’s Mint Candy Apple
- Pastel Purple Polish: OPI’s Do You Lilac It?
- Copper Metallic Polish: Essie’s Penny Talk
- Top Coat: Seche Vite Dry Fast
- Recommendations: Use masking tape to achieve sharp metallic lines.
DIY Instructions
Begin with a base coat to protect the nails. Apply pastel green on half of each nail, and pastel purple on the other half. Once dry, use masking tape to section off areas for the copper metallic polish. Apply the metallic polish, remove the tape while the polish is still slightly wet, and finish with a top coat for a stunning and durable look.
Luxurious Gold Leaf and Matte Black Elegance
This design contrasts the deep, matte black with striking gold leaf accents, evoking a sense of luxury and sophistication. The use of gold leaf on the nails adds a textured, metallic finish that catches the light beautifully, providing an opulent touch to any outfit.

Consumables List
- Base Coat: OPI Natural Base Coat
- Matte Black Polish: Essie’s Licorice
- Gold Leaf Sheets
- Top Coat: Seche Vite Dry Fast Top Coat
- Recommendations: Apply the gold leaf carefully to prevent tearing, using tweezers and a very light touch.
DIY Instructions
Apply a base coat to protect your nails. Once dry, apply two coats of matte black polish. While the second coat is still tacky, carefully place pieces of gold leaf on the nails. Seal with a top coat to smooth out the texture and enhance the metallic sheen.
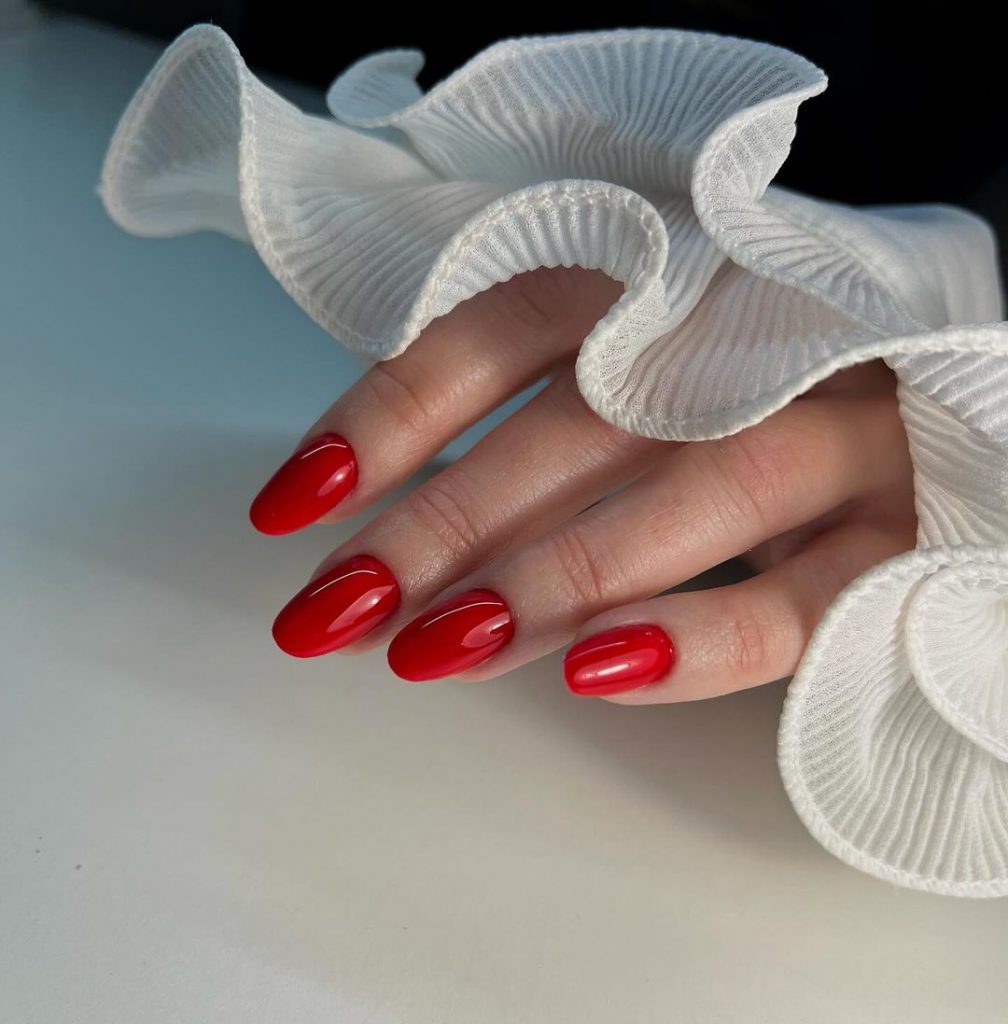
Vibrant Red Almond Perfection
This classic red nail design brings timeless elegance with a modern twist. The almond shape is perfectly suited for those looking for a sophisticated yet daring look. The vibrant red is eye-catching and expresses confidence and passion, ideal for any season but especially poignant as a transition into the cooler months.
Consumables List
-
- Base Coat: OPI Natural Base Coat
- Red Polish: Essie’s Really Red
- Almond Nail Tips
- Top Coat: Seche Vite Dry Fast
- Recommendations: For a flawless finish, consider applying a gel top coat for added durability and shine.
DIY Instructions
Apply a base coat to protect your nails. Attach almond nail tips and shape them to your desired silhouette. Apply two coats of vibrant red polish, allowing each coat to dry completely. Finish with a glossy top coat for a striking and durable finish.
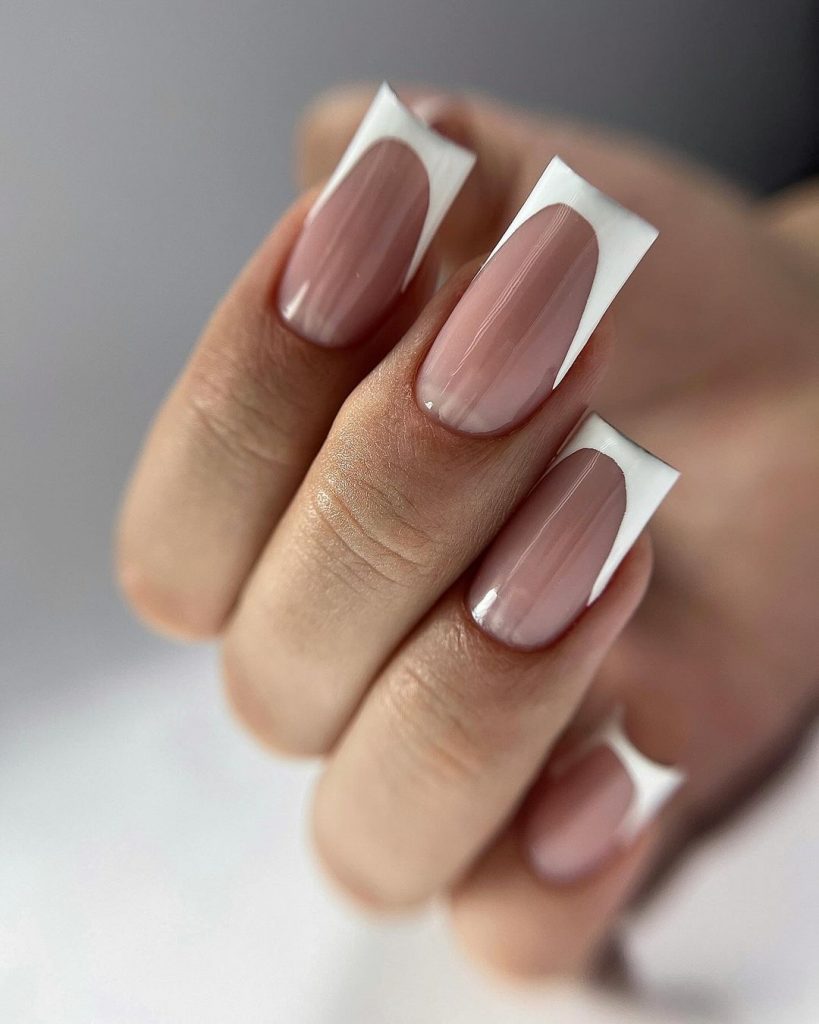
Chic White French Tips
The reimagined French manicure presented here features stark white tips on a nude base, offering a fresh take on a classic design. This look is minimalist yet chic, perfect for those who prefer a subtle yet polished appearance.
Consumables List
-
- Base Coat: Sally Hansen Double Duty
- Nude Polish: Essie’s Topless and Barefoot
- White Polish: OPI’s Alpine Snow
- Top Coat: Seche Vite Dry Fast
- Recommendations: Use tip guides or tape for precise and clean lines.
DIY Instructions
Apply a base coat to protect your nails. Paint your nails with a nude polish and let it dry completely. Use tip guides to apply white polish on the tips. Remove the guides while the polish is still wet. Finish with a top coat for a smooth, lasting finish.
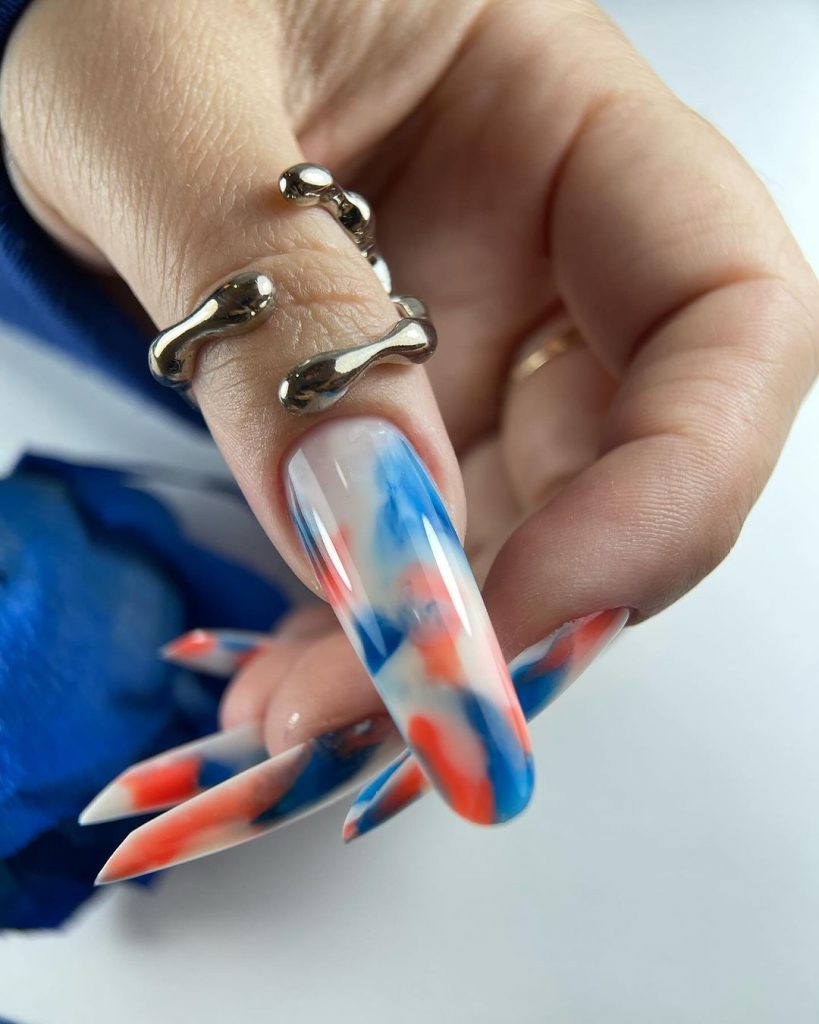
Dynamic Blue and Orange Splash
This nail design is bold and artistic, featuring a splash of blue and orange that mimics an abstract painting. This vibrant look is perfect for those who want to make a statement with their nails, embodying a creative and energetic spirit.
Consumables List
-
- Base Coat: OPI Natural Base Coat
- Blue Polish: Essie’s Butler Please
- Orange Polish: OPI’s A Roll in The Hague
- Detail Brush
- Top Coat: Seche Vite Dry Fast
- Recommendations: Use a detail brush to apply the splashes in a freeform pattern, allowing each color to slightly blend.
DIY Instructions
Apply a base coat to protect your nails. Paint a clear or nude base. Use a detail brush to splash blue and orange polish onto the nails, blending slightly while wet. Allow the design to dry completely before applying a top coat for a vibrant and protective finish.
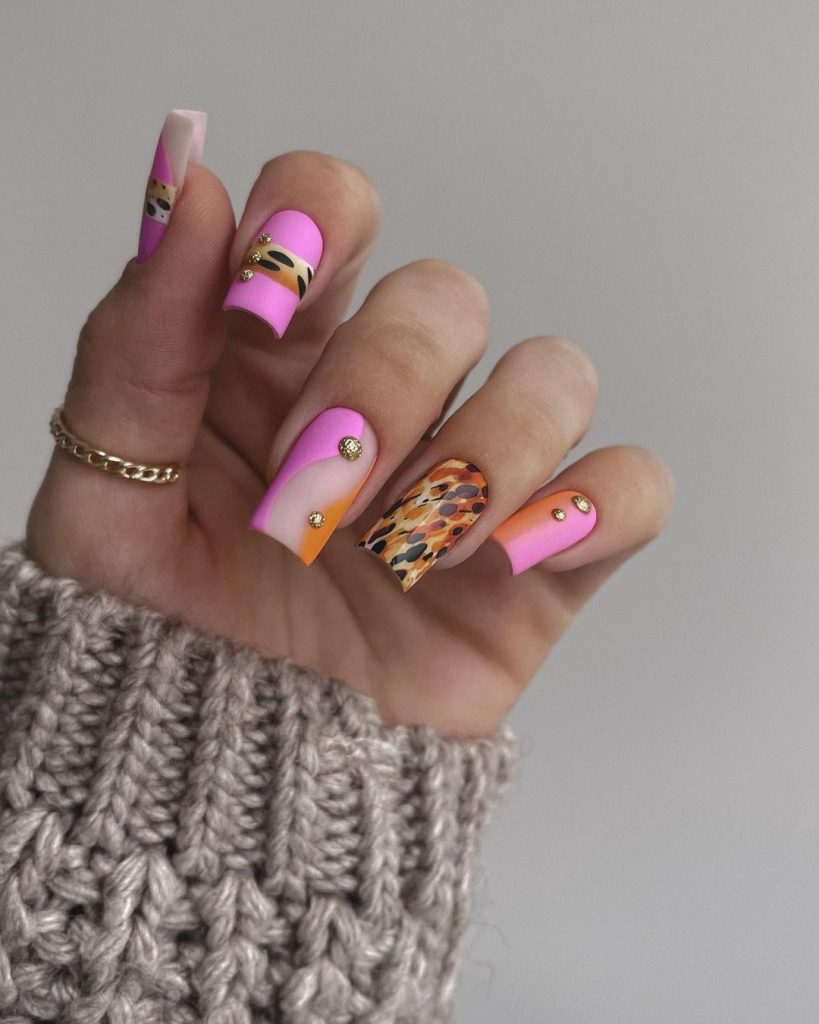
Playful Pink with Exotic Accents
This design combines playful pink hues with bold animal print and exotic golden accents, creating a look that’s both fun and glamorous. The pink base serves as a bright canvas for the intricate designs, making it a perfect choice for lively personalities.
Consumables List
-
- Base Coat: Essie’s First Base
- Pink Polish: OPI’s Pink Flamenco
- Gold Studs
- Animal Print Stickers or Hand-Painting
- Top Coat: Seche Vite Dry Fast
- Recommendations: Apply the animal print carefully either by stickers or hand-painting to maintain the integrity of the intricate designs.
DIY Instructions
Start with a base coat to protect your nails. Apply two coats of pink polish as the base color. Place animal print stickers or hand-paint designs on the accent nails. Embellish with gold studs for added glamour. Finish with a top coat to seal in the design and add shine.
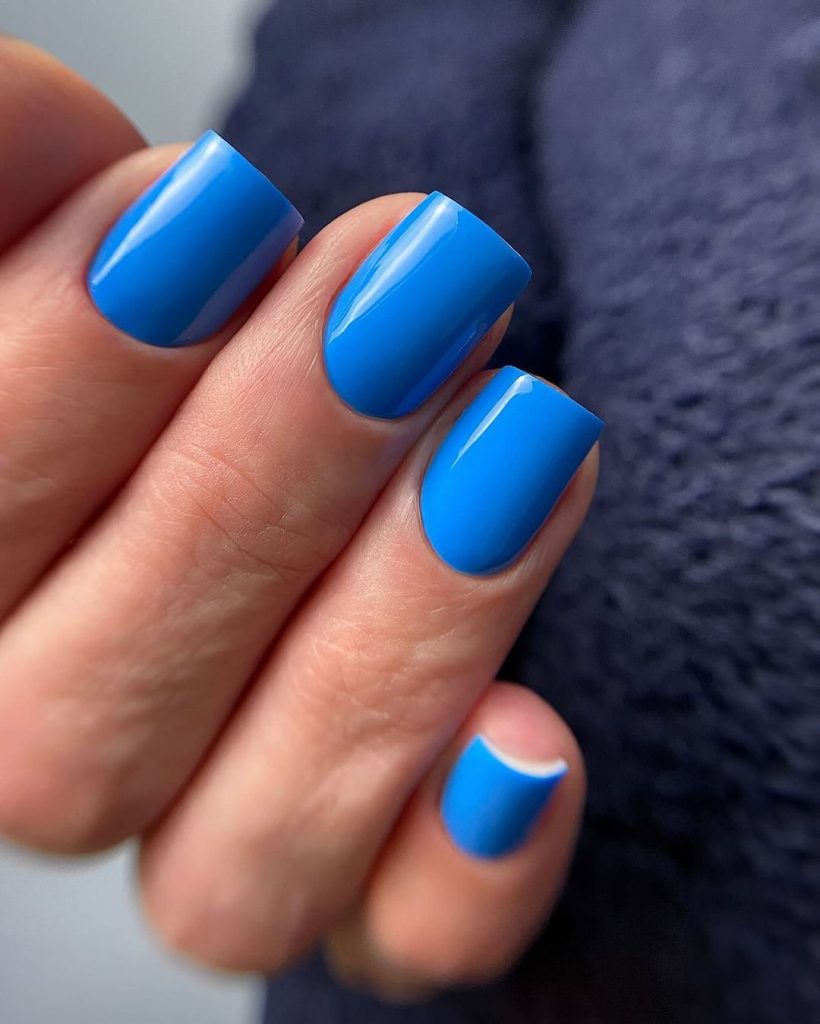
Captivating Cobalt Blue
This bold cobalt blue nail design exudes confidence and style. Its vibrant hue and glossy finish make it a standout choice for those wishing to make a statement with their nails. The smooth, even application reflects a meticulous manicure, perfect for any occasion.
Consumables List
-
- Base Coat: OPI Natural Base Coat
- Cobalt Blue Polish: Essie’s Butler Please
- Top Coat: Seche Vite Dry Fast
- Recommendations: Apply thin, even coats to achieve this saturated, glossy look.
DIY Instructions
Start by applying a base coat to protect your nails. Apply two coats of cobalt blue polish, allowing each layer to dry completely. Finish with a high-gloss top coat for a durable and shiny finish.
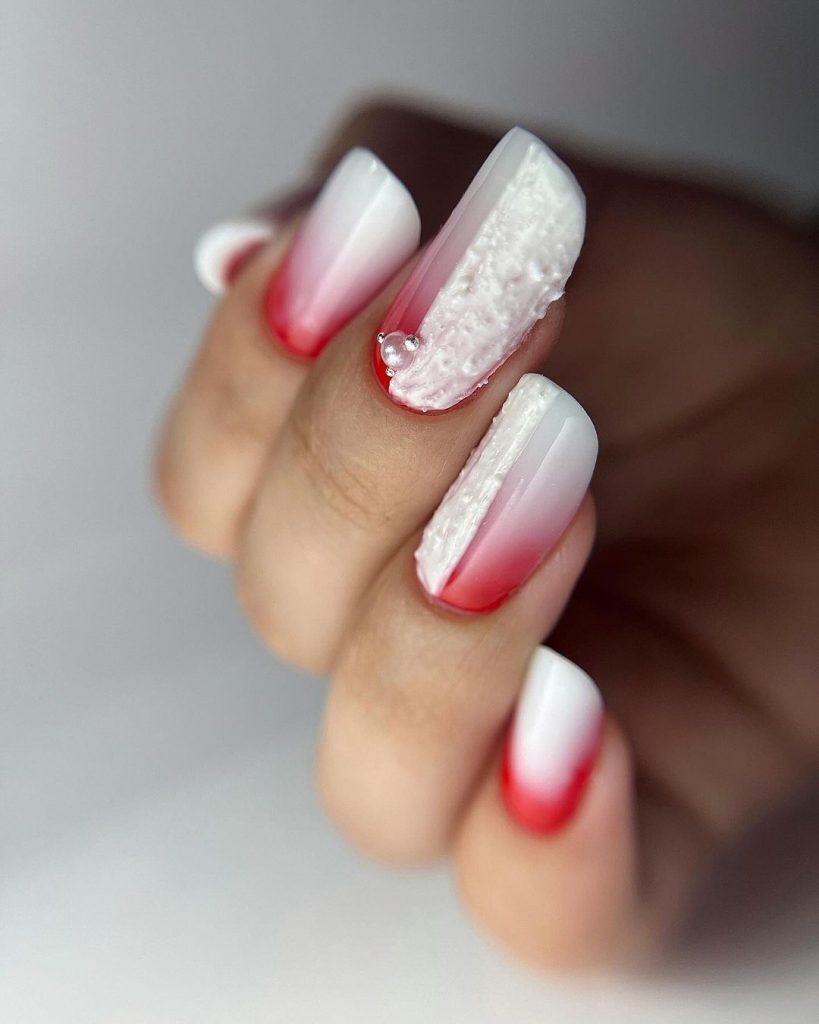
Gradient Red with Textured White
This nail design features a stunning red gradient fading into a textured white tip. This look combines the classic appeal of a French tip with a modern twist through the gradient technique and the addition of texture on the tips.
Consumables List
-
- Base Coat: Sally Hansen Double Duty
- Red Polish: OPI’s Big Apple Red
- White Textured Polish: OPI’s Alpine Snow
- Sponge: For gradient application
- Top Coat: Seche Vite Dry Fast
- Recommendations: Use a sponge to create a seamless gradient effect.
DIY Instructions
Apply a base coat to protect your nails. Paint the nails with red polish. While still tacky, use a sponge to apply white polish at the tips, blending it toward the center. Allow to dry, then apply a top coat for a smooth, long-lasting finish.
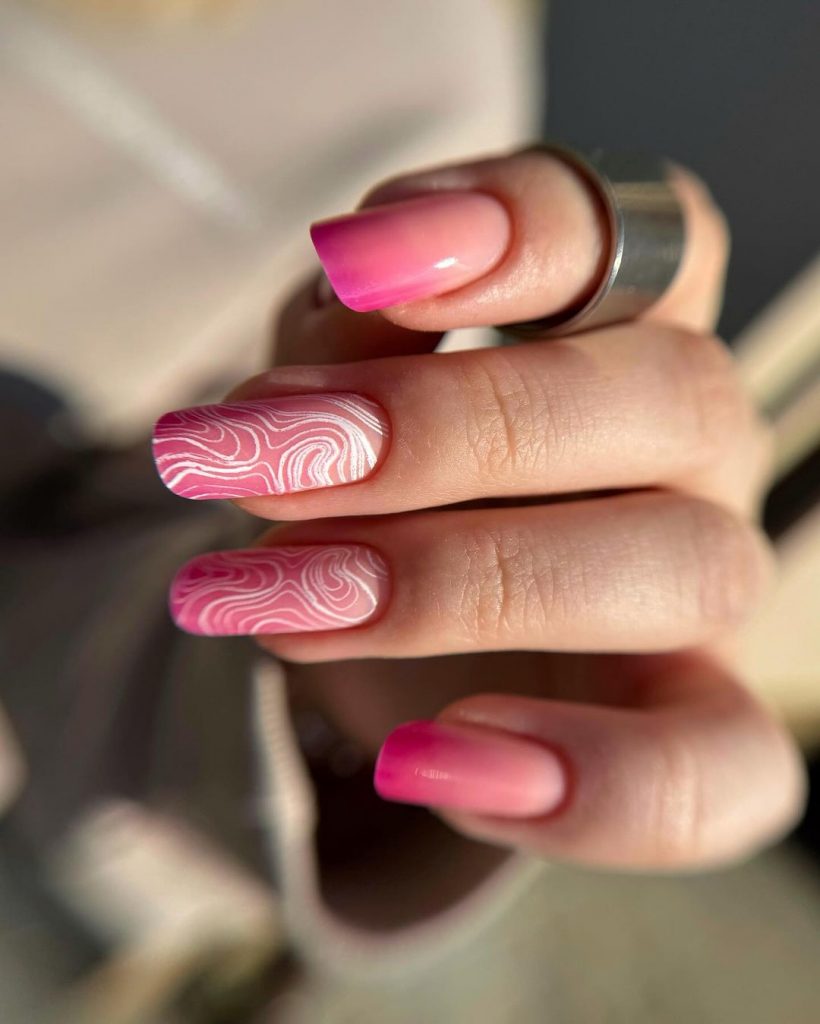
Swirling Candy Pink Marbling
This swirling candy pink marbled design is playful and artistic, perfect for expressing creativity. The gentle swirls of white and dark pink create a marbling effect that’s both eye-catching and elegant.
Consumables List
-
- Base Coat: Essie’s First Base
- Pink Polish: OPI’s Pink Flamenco
- White Polish: Essie’s Blanc
- Marbling Tool
- Top Coat: Seche Vite Dry Fast
- Recommendations: Work quickly with the marbling tool to swirl the colors while they are still wet.
DIY Instructions
Start with a base coat. Apply a light pink polish as the base. Drop small amounts of white and darker pink polish onto the wet base. Use a marbling tool to gently swirl the colors. Finish with a top coat to seal and smooth the design.
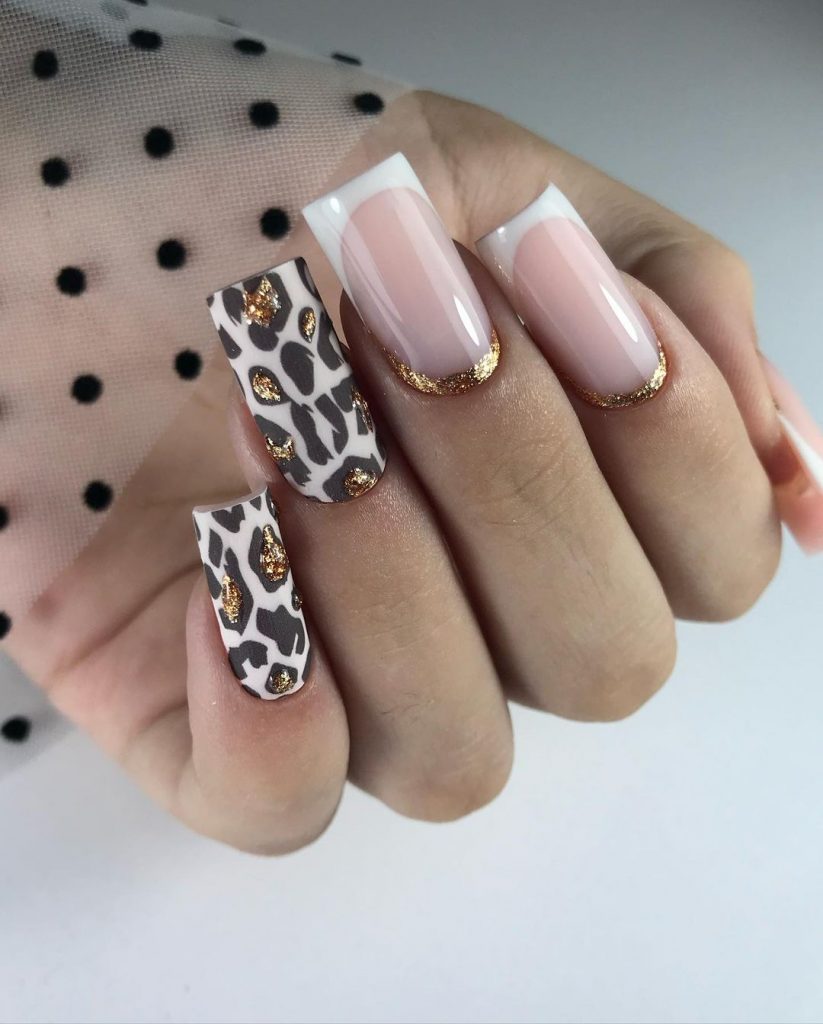
Elegant Leopard Print with Gold Flakes
This sophisticated design combines a classic French tip with a trendy leopard print, accented by luxurious gold flakes. The use of neutral tones with bold patterns makes this design versatile and suitable for both day and evening wear.
Consumables List
-
- Base Coat: OPI Natural Base Coat
- Nude Polish: Essie’s Topless and Barefoot
- Black and Gold Polish for detailing
- Gold Leaf
- Top Coat: Seche Vite Dry Fast
- Recommendations: Apply the gold leaf sparingly to enhance the luxurious feel without overpowering the delicate leopard print.
DIY Instructions
Apply a base coat. Paint the nails with a nude polish. Once dry, use black polish to add leopard spots. Apply gold leaf and gold polish accents around the spots. Finish with a top coat for a glossy, protective finish.
Vibrant Pastel Rainbow
This cheerful pastel rainbow design is perfect for those who love color and fun. The smooth transition between hues creates a soft yet vibrant look that’s perfect for spring or bringing cheer to cooler days.
Consumables List
-
- Base Coat: Sally Hansen Double Duty
- Pastel Polishes: Array of OPI pastel colors
- Top Coat: Seche Vite Dry Fast
- Recommendations: Use a sponge for blending the colors to achieve the smooth pastel gradient.
DIY Instructions
Begin with a base coat to protect your nails. Paint each nail a different pastel shade. While still wet, use a sponge to softly blend the edges where the colors meet, creating a seamless gradient. Finish with a top coat for a smooth and durable finish.
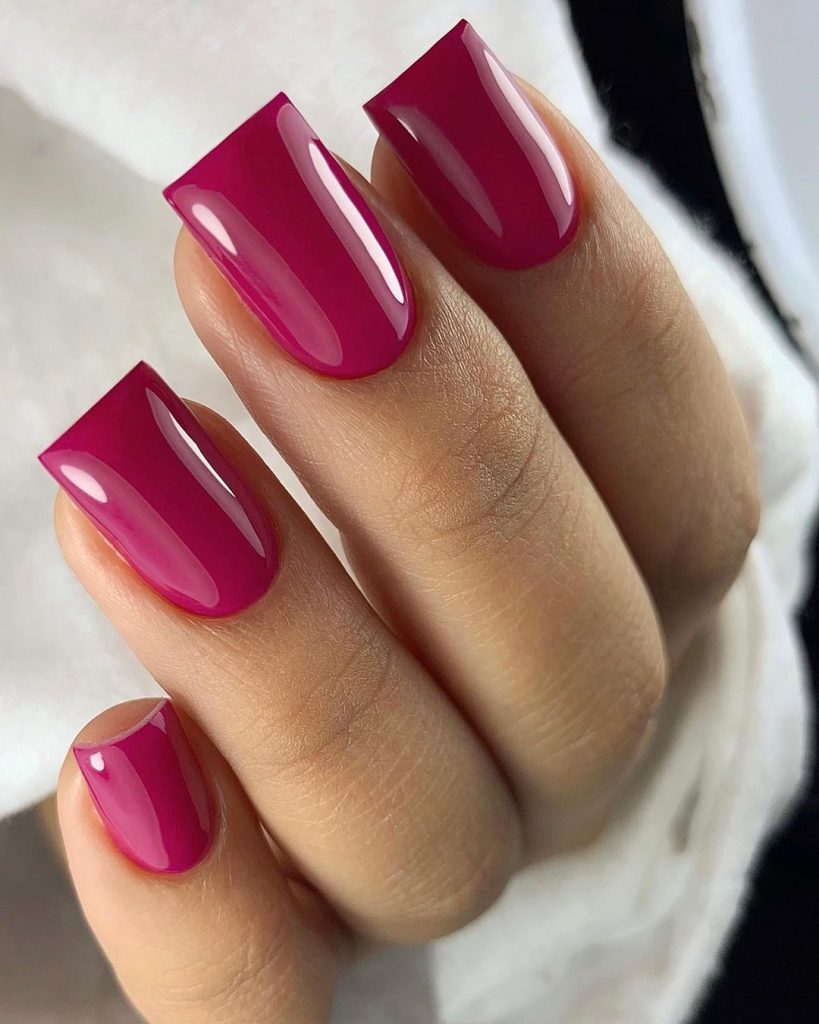
Radiant Fuchsia Gloss
This nail design features a stunning fuchsia shade that is both bold and beautiful. The high gloss finish not only enhances the depth of color but also adds a touch of elegance and sophistication. This shade of pink is vibrant and commands attention, making it perfect for those who want to make a fashion statement.
Consumables List
- Base Coat: Essie’s First Base
- Fuchsia Polish: OPI’s Kiss Me on My Tulips
- Top Coat: Seche Vite Dry Fast
- Recommendations: For a flawless glossy finish, apply the top coat generously to avoid streaks and maintain the shine.


0 Comments