Get ready to elevate your summer nail game with neon shades and captivating designs that perfectly embody the season’s hottest trends. Embrace vibrant hues like pink and green to make a bold statement. Opting for short acrylic nails ensures both style and practicality. Incorporating simple yet chic art designs such as stripes or dots adds an extra touch of charm to your nails, making them the perfect companion for all your summer escapades. Plus, the affordability of this nail type makes it a crowd favorite, offering great value without compromising on style.
Ombre Sky
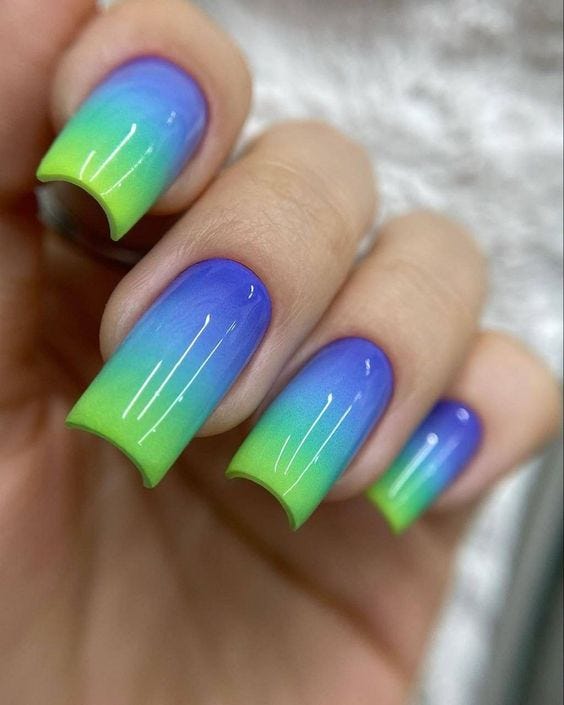
Presents a stunning sky-inspired ombre, with cool blues transitioning into a fresh green. The long, coffin-shaped nails offer a perfect canvas for the ombre effect, mimicking the vast expanse of a summer sky.
Essential Consumables
- White Polish: Start with a white base using Essie’s ‘Blanc’.
- Blue and Green Polishes: Use Sally Hansen’s ‘Blue Me Away!’ and ‘Green With Envy’.
- Latex Barrier: Apply around the nail for easy cleanup.
- Top Coat: Finish with a swipe of the CND Vinylux Long Wear Top Coat.
This ombre can be a bit messy, so the latex barrier is essential for keeping your skin polish-free.
DIY Tutorial
Paint your nails white as a base. Then, on a sponge, apply blue and green polish side by side, slightly overlapping. Dab onto the nail, reapplying polish to the sponge as needed. Peel off the latex barrier and apply the top coat.
Festival of Colors
Is a celebration of color, each nail showcasing a different vibrant neon shade. The matte finish on each creates a modern look that’s trendy and tactile. It’s a simple yet impactful design that captures the essence of a playful summer.

Essential Consumables
- Neon Polishes: A selection from the Nails Inc. Neon Collection.
- Matte Top Coat: Use Matte About You by Essie.
- Nail File: To shape the nails, a high-grit file is necessary.
Each color in this collection is striking on its own, but together, they create a fun, summer-ready look.
DIY Tutorial
After filing your nails into your desired shape, apply two coats of each neon polish. Allow them to dry completely before adding the matte top coat for an on-trend finish.
Neon Nostalgia with a Modern Twist
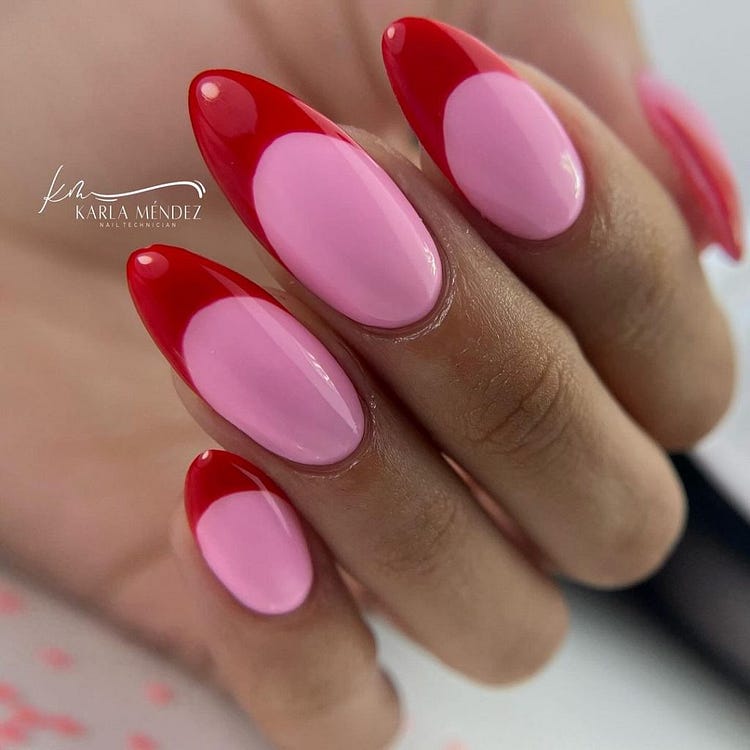
The fusion of soft nude tones with vibrant neon outlines in this manicure brings a contemporary yet nostalgic feel to the nails. The almond shape provides a classic and feminine silhouette that’s flattering for all hand types. The careful selection of neon colors creates an eclectic but harmonious look.

- Consumables for Neon Nostalgia with a Modern Twist:
- Nude base polish (Opt for a semi-sheer variety for that perfect blend with the skin)
- Neon polishes in various shades (Quality ones that won’t fade)
- Fine-tip brush for impeccable outlining
At home, after your nude base is dry, take a fine brush dipped in neon polish to trace the edge of your nails. It’s a test of precision, but the end result is absolutely worth the effort — a design that’s both refined and spirited.
Neon Orange Elegance
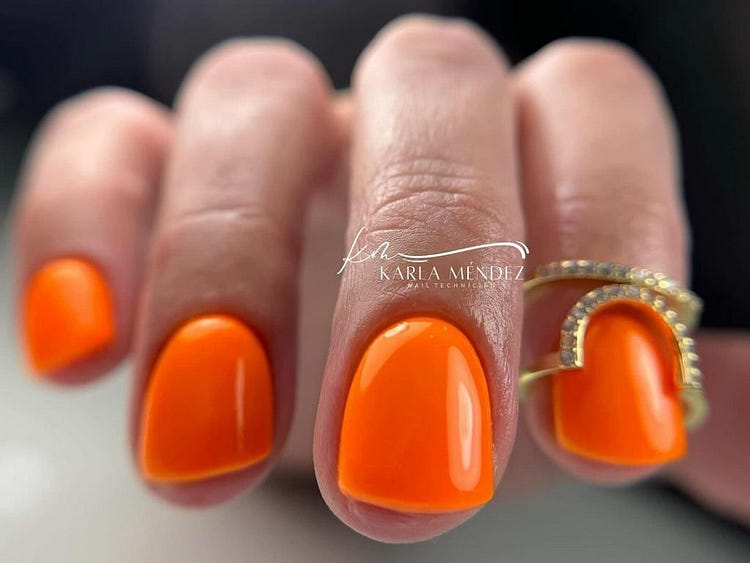
Diving into the neon palette, this neon orange is the epitome of summer vibrance. As a professional manicurist, the rich saturation and glossy finish scream beach parties and sunset cocktails. The nail shape is meticulously sculpted, offering a canvas that is as fun as it is sophisticated.
- Consumables for Neon Orange Elegance:
- High-quality neon orange polish (Preferably UV-reactive for that extra pop)
- Glossy top coat for a mesmerizing sheen (I recommend a no-wipe gel top coat for longevity)
- Nail strengthener as a base (Essential for healthy nails beneath the color)
Creating this look at home requires a steady hand and layers of patience. Start with a clean, filed nail, apply the strengthener, and let it set. Next, layer your neon polish, allowing each coat to dry thoroughly before applying the next. Seal it with a top coat, and you’ve got summer at your fingertips!
Ombre Pink Fantasy
Short nails come alive with this stunning ombre effect that seamlessly blends a candy pink into a hot fuchsia. From a professional standpoint, this design offers a transition as smooth as summer sunsets and is perfect for those looking for a mix of cute and daring.
- Consumables for Ombre Pink Fantasy:
- Two shades of pink polish (I suggest a soft pink and a vibrant fuchsia)
- A sponge for the ombre application
- A glossy top coat to blend and seal the design
To achieve this at home, apply the lighter pink as your base. Then, dab the two pinks onto a sponge and press onto the nail, repeating until the gradient effect is to your liking. Finish with a top coat to blend the colors and add gloss.
Fuchsia Flair with a Twist
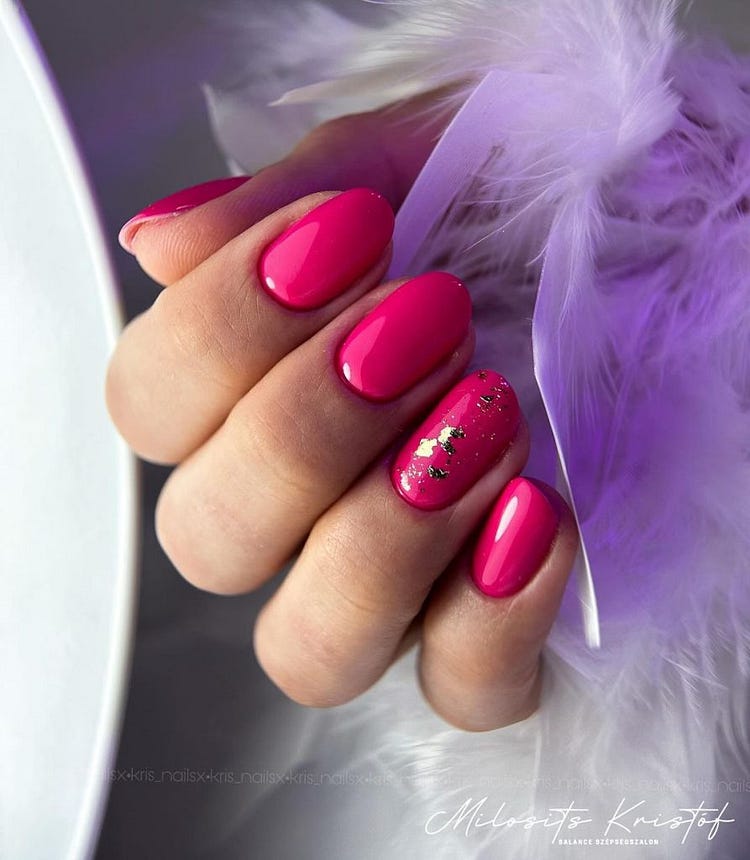
Bright, bold, and beautifully edgy, this fuchsia design incorporates a playful touch of gold foil. In my professional experience, such artistic nails become a conversation starter and exude a confident aura.
- Consumables for Fuchsia Flair with a Twist:
- Vivid fuchsia polish (Choose a shade that speaks ‘fun’)
- Gold leaf foil for the accent (A little goes a long way)
- A top coat to secure and spotlight the foil’s shimmer
To recreate this at home, start with a base of fuchsia. When dry, apply adhesive for the foil in random spots, press the gold leaf on, and seal it with your top coat. Voilà — art at the tip of your fingers.
Mint Condition
Mint green is not just refreshing for the palate but also for the eyes, especially in the form of these simply sophisticated nails. The shade is a nod to summer’s playful side, while the finish is nothing short of chic.

- Consumables for Mint Condition:
- Mint green polish (Look for a creamy formula for smooth application)
- A high-shine top coat (To capture the light and enhance the color)
- Cuticle oil (For a flawless finish around the nail beds)
At home, ensure your nails are shaped to your liking before applying the mint polish. A couple of coats should suffice for opacity. Finish with a top coat, and don’t forget to hydrate your cuticles with oil.
Psychedelic Swirls
Summer is the season of freedom and creative expression, captured here through a mesmerizing swirl of neon hues. Each nail is a unique canvas, showcasing a blend of colors that evoke the energy of summer music festivals and lively street art.

- Consumables for Psychedelic Swirls:
- An array of neon polishes (The brighter, the better)
- A detail brush to swirl and mix the colors on the nail
- A quick-dry top coat to seal the deal
For this fun endeavor at home, begin with a white base to make the colors pop. Then, while the base is still tacky, use a detail brush to apply and swirl different neon shades. Finish with a quick-dry top coat to protect your design and add that glossy sheen. Remember, there are no mistakes here — just happy, vivid whirls of color.
The Serenity of Sky Blue
This single-color manicure in sky blue speaks volumes with its simplicity and depth. The rounded nail shape makes it a practical choice for everyday wear while maintaining an air of sophistication.
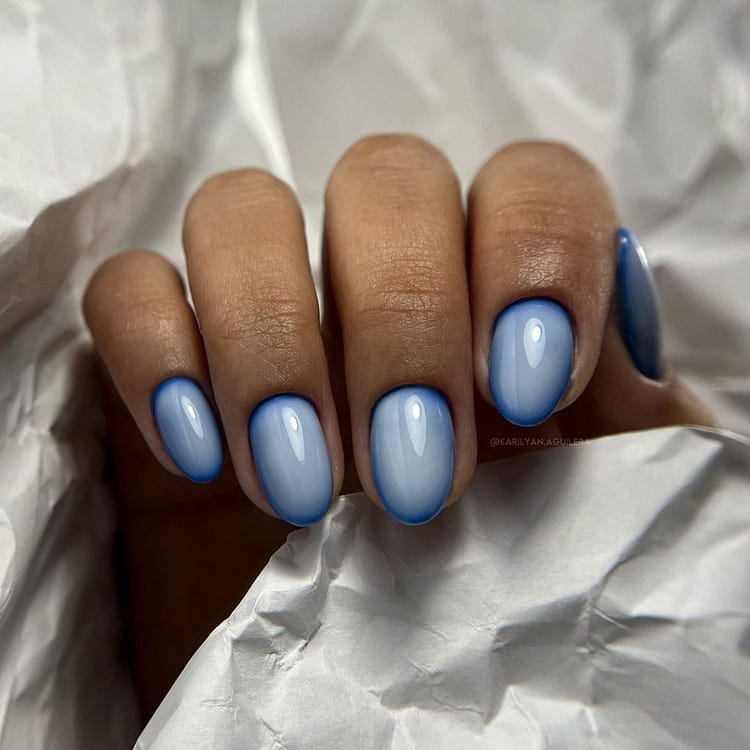
- Consumables for The Serenity of Sky Blue:
- Sky blue polish (A gel formula is preferred for its plump finish)
- Clear base and top coat (To lock in the color and add a gel-like shine)
To mimic this serene look, begin with a clean, buffed nail. Apply a base coat followed by two coats of your sky blue polish. Finish with a glossy top coat for that glassy sky effect.
Green with Envy
This neon green gradient gives a fresh and zesty touch to your summer look. The seamless blend from a soft mint to a bright neon green mirrors the natural transition from a calm sea to the vibrant land in summer.

- Consumables for Green with Envy:
- Mint green and neon green polish (The more pigmented, the better)
- Makeup sponge for the gradient
- Protective top coat for a seamless finish
For a DIY gradient, apply the mint green as a base. Then, using a sponge, dab on the neon green from the tip, working downwards to create that beautiful blend. Seal it with a top coat for longevity.


0 Comments