Transform your nails into a mini aquarium with our ocean nails. This intricate design uses 3D art to create a realistic ocean scene, complete with tiny fish and coral details. The clear and blue acrylic layers serve as the perfect backdrop, offering a glimpse into the serene underwater world.
Nautical Charm
Reflecting the nautical theme, this design uses designs simple stripes and acrylic short techniques to depict the classic sea summer look. It’s crisp, clean, and perfect for sailing enthusiasts or a day at the marina.
Essential Materials
- Acrylics: For durable stripes
- Colors: Navy blue, white, and red
- Striping Tape: For perfect lines
- Gloss Coat: For a sleek finish
Step-by-Step Creation
- Paint the base in white.
- Use striping tape to lay down navy and red stripes.
- Remove the tape and correct any smudges.
- Apply a gloss coat for a sleek, wet look.
Ocean Blue Waves
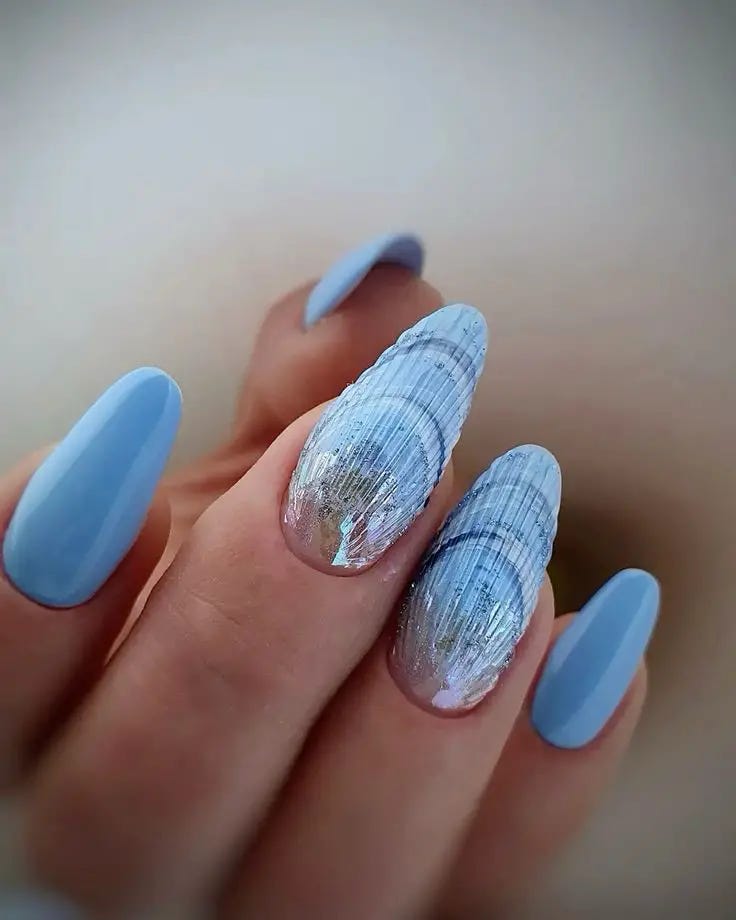
Ocean nails capture the serene beauty of the sea and are perfect for anyone looking to add a splash of sophistication to their look. The nails feature a mesmerizing blend of deep blue hues and subtle waves, mimicking the peaceful ocean. Accents of shimmering bling and marble textures enhance the aquatic effect, creating a sense of depth and movement.
Consumables for Creating These Nails
- Base Coat: OPI Natural Nail Base Coat
- Blue Polish: Essie’s “After School Boy Blazer”
- Shimmer Topcoat: Sally Hansen’s “Diamond Flash”
- Marble Effect Tool: Dotting tools or a fine brush
- Recommendations: Use the shimmer topcoat sparingly to maintain the depth of the blue base.
DIY Nail Design Instructions
- Apply the base coat and let it dry.
- Paint two coats of the deep blue polish.
- While the second coat is still tacky, lightly dab a crumpled piece of saran wrap dipped in lighter blue polish to create the marble effect.
- Finish with the shimmer topcoat for a sparkling ocean finish.
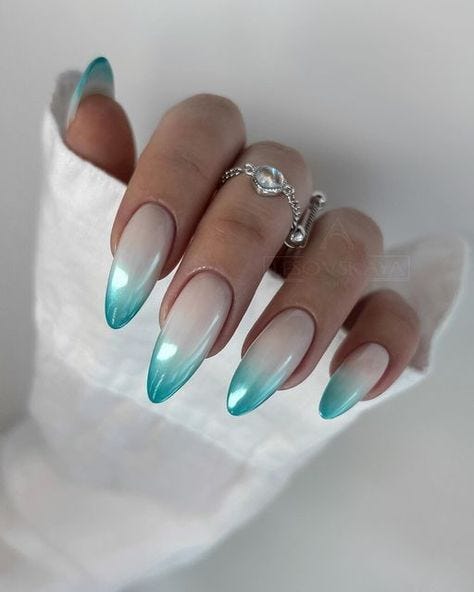
Iridescent Tidal Gradient
The nails showcase an ethereal gradient design that mimics the gentle flow and iridescent shimmer of ocean tides. The transition from a milky opalescent white at the cuticle to a serene aqua at the tips evokes the serene hues of tropical waters. This look is perfect for anyone seeking a sophisticated yet understated nod to oceanic beauty.
Consumables for Creating These Nails
- Base Coat: Sally Hansen Miracle Cure
- White Opalescent Polish: “Kyoto Pearl” by OPI
- Aqua Polish: “For Audrey” by China Glaze
- Top Coat: Essie Gel Setter Top Coat
- Recommendations: Use a makeup sponge to blend the polishes seamlessly on the nail for a smooth gradient transition.
DIY Nail Design Instructions
- Begin by applying a base coat to protect your natural nails and provide a smooth canvas.
- Paint the entire nail with the white opalescent polish as the base color.
- Once dry, apply a small amount of aqua polish to a makeup sponge and gently dab the color starting from the tip and working toward the middle of the nail to create a gradient effect.
- Repeat the sponging process as needed to achieve the desired opacity and blend.
- Finish with a top coat to seal in the design and add a glossy, durable finish.
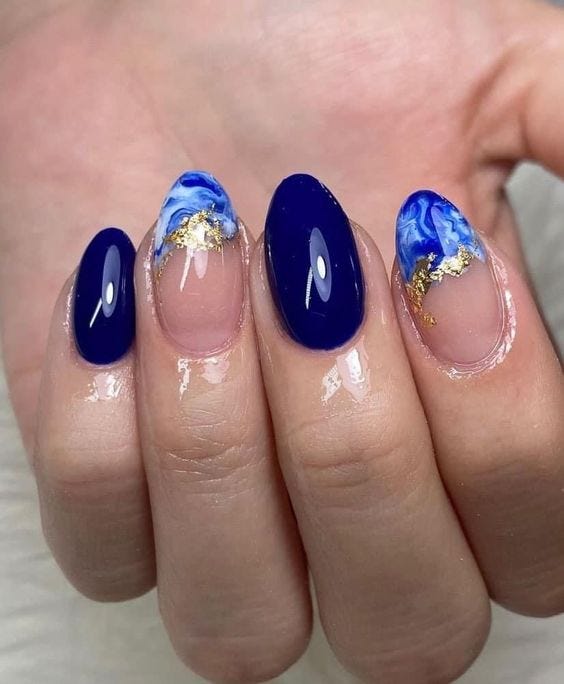
Deep Sea Exploration
The design showcased takes inspiration from the mysterious depths of the ocean. The use of dark blue and clear acrylic creates a look reminiscent of the deep sea. Rose gold flakes represent the sandy ocean floor, offering a luxurious yet subtle nod to beach treasures.

Consumables for Creating These Nails
- Dark Blue Polish: Navy Narcissism by OPI
- Clear Acrylic: Clear Overlay by CND
- Rose Gold Flakes: Luxe Nail Art Rose Gold Leaf
- Recommendations: Apply rose gold flakes sparingly to mimic the sporadic nature of sand particles.
DIY Nail Design Instructions
- Apply a base coat of dark blue polish.
- Mix clear acrylic with rose gold flakes and apply over the base in a thin layer.
- Shape the nails while the acrylic is still pliable.
- Finish with a high-gloss topcoat to seal and protect the design.
Seaside Getaway
The pictured nail design resembles the soft sandy shores of a serene beach.
It uses a gradient of sandy beige color, transitioning into the blue color of sea foam, mimicking the place where the sea meets the sand. Delicate patterns in the form of sea beach waves create a dynamic yet understated look, making these nails the perfect choice for a summer vacation.
Consumables for Creating These Nails
- Base Coat: Orly Bonder Rubberized Basecoat
- Beige Polish: “Sand Tropez” by Essie
- Detailing Brush: For intricate wave patterns
- Recommendations: Use a sponge for the gradient to achieve a soft, seamless transition between colors.
DIY Nail Design Instructions
- Apply the rubberized base coat for better polish adhesion.
- To create a gradient effect, apply beige and blue polish on a sponge and swipe over the nail.
- Use a fine detailing brush to draw delicate waves with a slightly darker blue.
- Finish with a clear topcoat to enhance durability and shine.
Tropical Marine Life
The vivid nail art features a stunning depiction of tropical marine life. Bright colors and intricate designs include coral, fish, and aquarium elements that are enhanced by a clear acrylic overlay, giving the appearance of looking into a clear ocean. This design is an artistic celebration of marine biodiversity, using a mix of acrylic and polish dips to achieve depth and realism.
Consumables for Creating These Nails
- Colored Acrylics: Multiple shades for fish and coral
- Clear Acrylic: To encapsulate the design and add depth
- Fine Detail Brushes: For precise painting of marine life
- Polish Dips: To add color and texture
- Recommendations: Layer the acrylics to build up the design before encapsulating with clear acrylic for a 3D look.
DIY Nail Design Instructions
- Apply a pale base color and let it dry.
- Use fine detail brushes and various colored acrylics to paint the marine life designs.
- Once the art is complete, cover with a layer of clear acrylic to encapsulate the design.
- File and shape the nails, then apply a glossy topcoat for a final polished look.
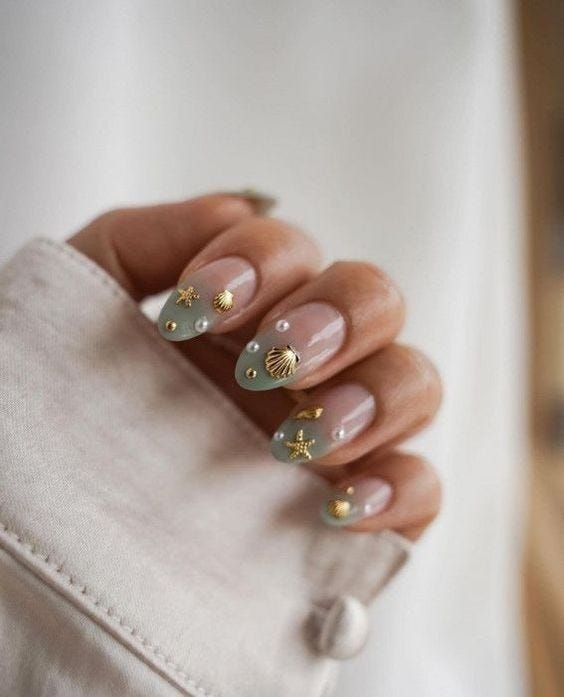
Seashell Accents on Tranquil Seas
The nail design beautifully incorporates delicate seashell and starfish accents on a serene seafoam green base. The subtle use of gold adds a hint of luxury, making these nails perfect for both day wear and special occasions. The design captures the essence of a quiet beach, reflecting the tranquility of the ocean with a touch of whimsical charm.
Consumables for Creating These Nails
- Base Coat: CND Stickey Base Coat
- Seafoam Green Polish: “Mint Condition” by Orly
- Gold Accents: Gold foil and small metallic studs
- Top Coat: Glossy Seche Vite for a durable finish
- Recommendations: Place the decals with tweezers for precision and apply a thick top coat to secure the embellishments.
DIY Nail Design Instructions
- Apply the base coat and let it dry thoroughly.
- Paint two coats of the seafoam green polish.
- Carefully place gold foil and metallic studs in seashell and starfish shapes.
- Seal everything with a glossy top coat to ensure longevity and enhance the metallic shine.
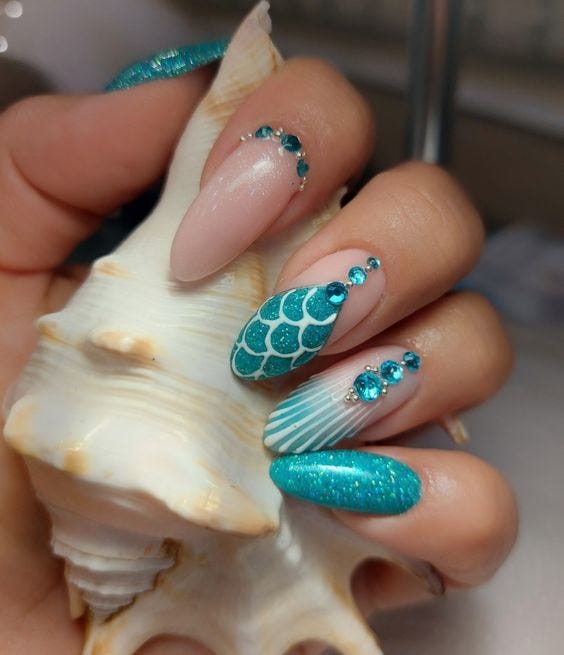
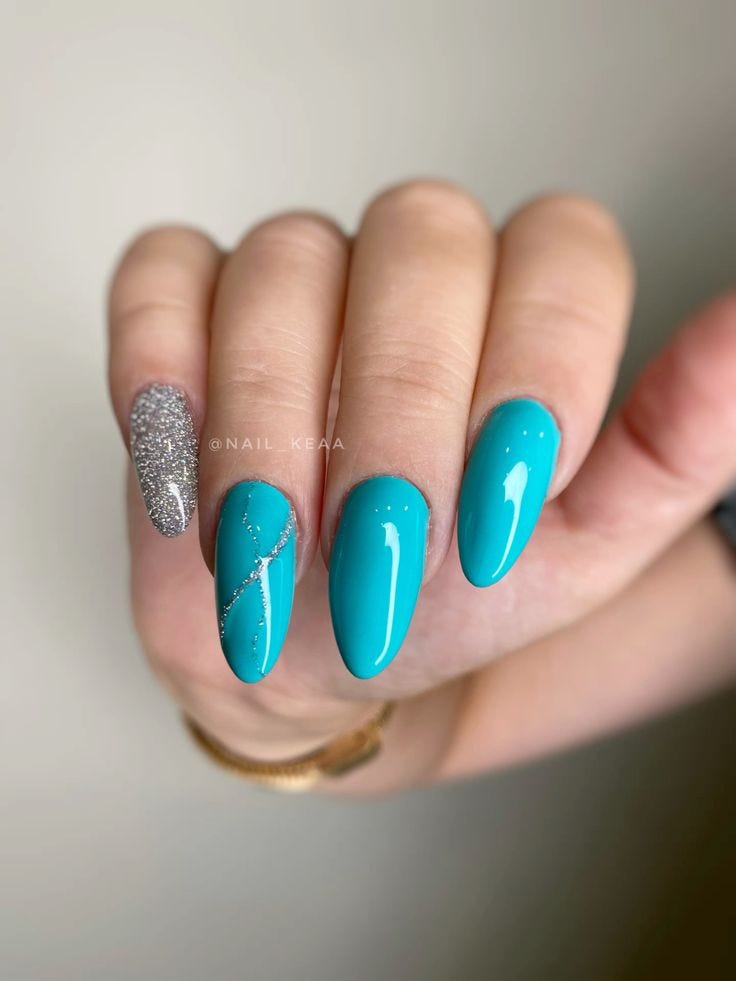
Vibrant Turquoise with Silver Accents
Showcases a bold turquoise polish paired with a dazzling silver glittered nail, creating a vibrant look reminiscent of ocean waves under the summer sun. This design is perfect for those who love to make a statement with their nails, combining summer vibes with a festive sparkle.
Consumables for Creating These Nails
- Turquoise Polish: “Teal the Cows Come Home” by OPI
- Silver Glitter Polish: “Silver on Ice” by Essie
- Base and Top Coat: Long-lasting formulas from Revlon
- Recommendations: Use thin layers of glitter to build up to the desired intensity without getting too thick.
DIY Nail Design Instructions
- Start with a solid base coat to protect your nails.
- Apply two coats of turquoise polish on all but one finger.
- For the accent nail, use multiple layers of silver glitter polish until you achieve full coverage.
- Finish with a top coat for extra shine and protection.
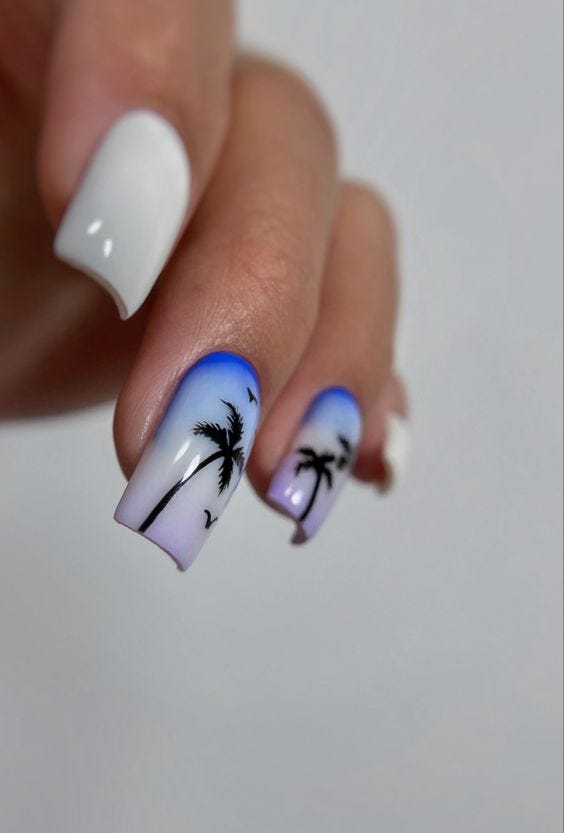
Sunset Palms
The nails are artfully painted with a sunset backdrop featuring silhouetted palm trees, capturing the breathtaking beauty of a beach at dusk. The gradient from lavender to blue creates a stunning sky effect, while the detailed palm trees add a dramatic touch.
Consumables for Creating These Nails
- Gradient Polishes: “Bikini So Teeny” by Essie (blue) and “Splash of Grenadine” by Essie (lavender)
- Detailing Brush: For the palm trees
- Top Coat: High gloss for a smooth finish
- Recommendations: Practice the palm tree design on paper before attempting it on your nails to ensure precision.
DIY Nail Design Instructions
- Apply a base coat to protect your nails.
- Sponge on the gradient effect using blue and lavender polishes.
- Once dry, use a fine brush to paint the palm tree silhouettes in black.
- Seal the design with a high-gloss top coat for a smooth and protective finish.
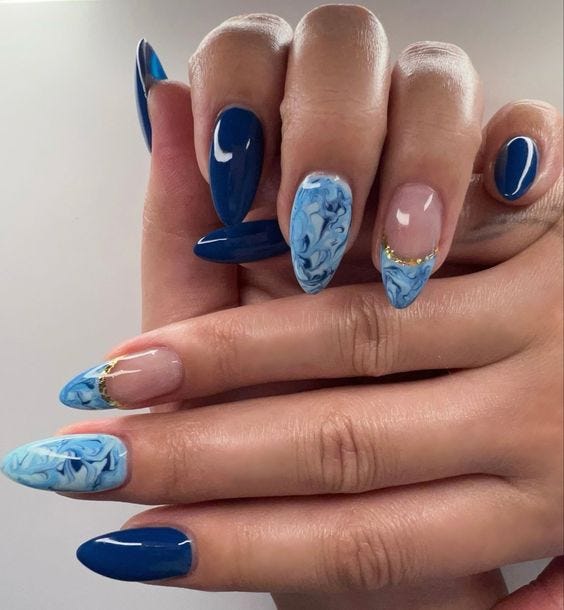
Oceanic Marble and Coral Touches
The design depicted offers a refreshing twist on traditional ocean themes by incorporating a delicate marble effect with hints of coral and turquoise. This style simulates the fluid, overlapping waves of the sea with an artistic flair. Subtle touches of white and coral accents enhance the aquatic feeling, making these nails a perfect choice for sea beach waves enthusiasts.

Consumables for Creating These Nails
- White Polish: “Alpine Snow” by OPI
- Turquoise and Coral Polishes: “Turquoise & Caicos” and “Tart Deco” by Essie
- Marbling Tool: Fine-tip brushes or a marbling dotting tool
- Top Coat: A durable clear coat from Sally Hansen
- Recommendations: Use the marbling tool to softly blend the colors on a wet base for a seamless watery effect.
DIY Nail Design Instructions
- Start with a solid white base to highlight the colors.
- While the base is still tacky, drop small dots of turquoise and coral polish and use the marbling tool to create wavy patterns.
- Allow each nail to dry completely, avoiding smudges.
- Finish with a strong top coat to seal the design and add a glossy shine.
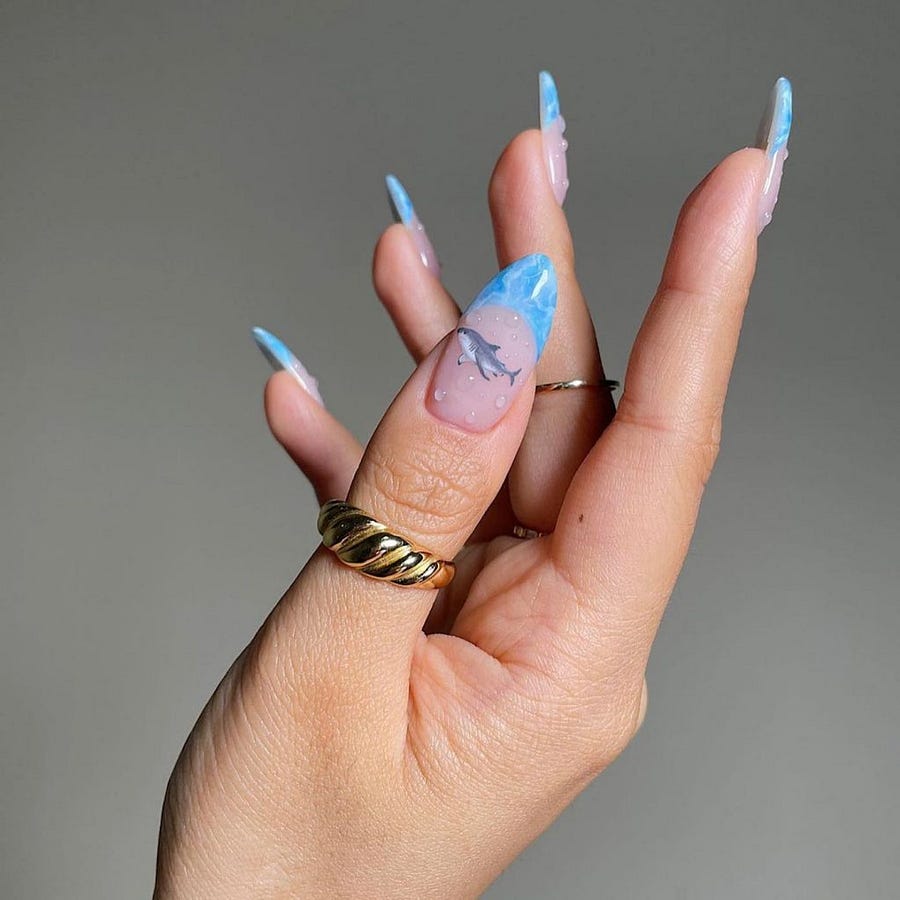
Underwater Flora and Fauna
An exquisite design that captures the enchanting beauty of underwater life on your fingertips. This nail art features a soft pastel base with blue and pink overlays that mimic the delicate nature of underwater flora. The intricate details of the fish, drawn with precision, offer a glimpse into the mystical sea world.
Consumables for Creating These Nails
- Pastel Polishes: “Romper Room” by Essie (pink) and “Bikini So Teeny” by Essie (blue)
- Detailing Brushes: For intricate designs
- Acrylic paints: For detailed painting of sea creatures.
- Top Coat: UV top coat for durability and shine
- Recommendations: Practice the seahorse and coral designs on paper before painting on nails to ensure accuracy and detail.
DIY Nail Design Instructions
- Apply a light pink base coat and let it dry completely.
- Sponge a subtle blue gradient on the tips.
- With a thin brush, add designs of sea creatures and coral, using white acrylic paint to highlight details.
- Apply several layers of UV top coat to protect the detailed work and enhance the depth of the design.
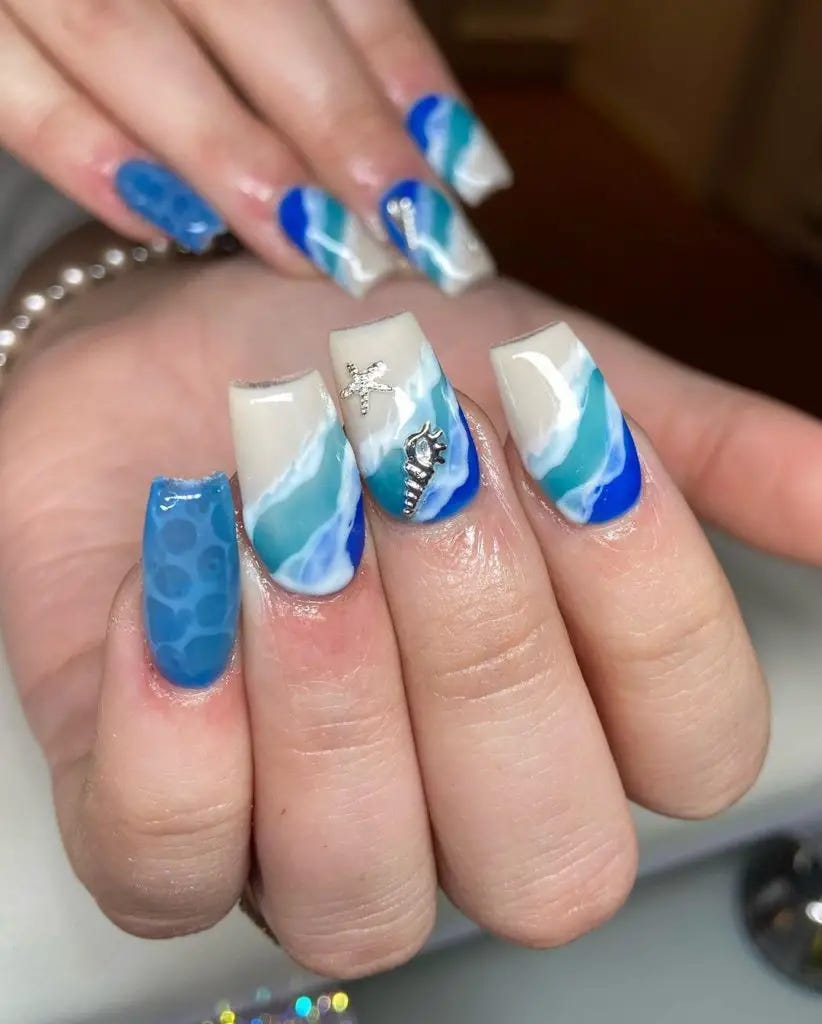
Dynamic Ocean Waves and Marine Charms
The nail design captures the dynamic movement of ocean waves using a stunning combination of blue and white. The addition of marine-themed charms such as seashells and starfish enhances the oceanic vibe. This design employs a clever use of 3D elements to bring a tactile dimension to the manicure, perfect for those who appreciate intricate details.
Consumables for Creating These Nails
- Base Coat: Essie All in One Base Coat
- Blue Polish: “Bikini So Teeny” by Essie
- White Marble Polish: “Alpine Snow” by OPI
- Charms and Decals: Marine charms available from Michael’s Craft Store
- Top Coat: Sally Hansen’s Miracle Gel Top Coat
- Recommendations: Apply the charms with nail glue to ensure they adhere through daily activities.
DIY Nail Design Instructions
- Begin with a clear base coat to protect the natural nails.
- Apply the blue polish as a base, then swirl in white polish while wet to create the wave effect.
- Carefully place the charms on the nails while the polish is still slightly tacky.
- Seal everything with a top coat for a glossy finish and added durability.
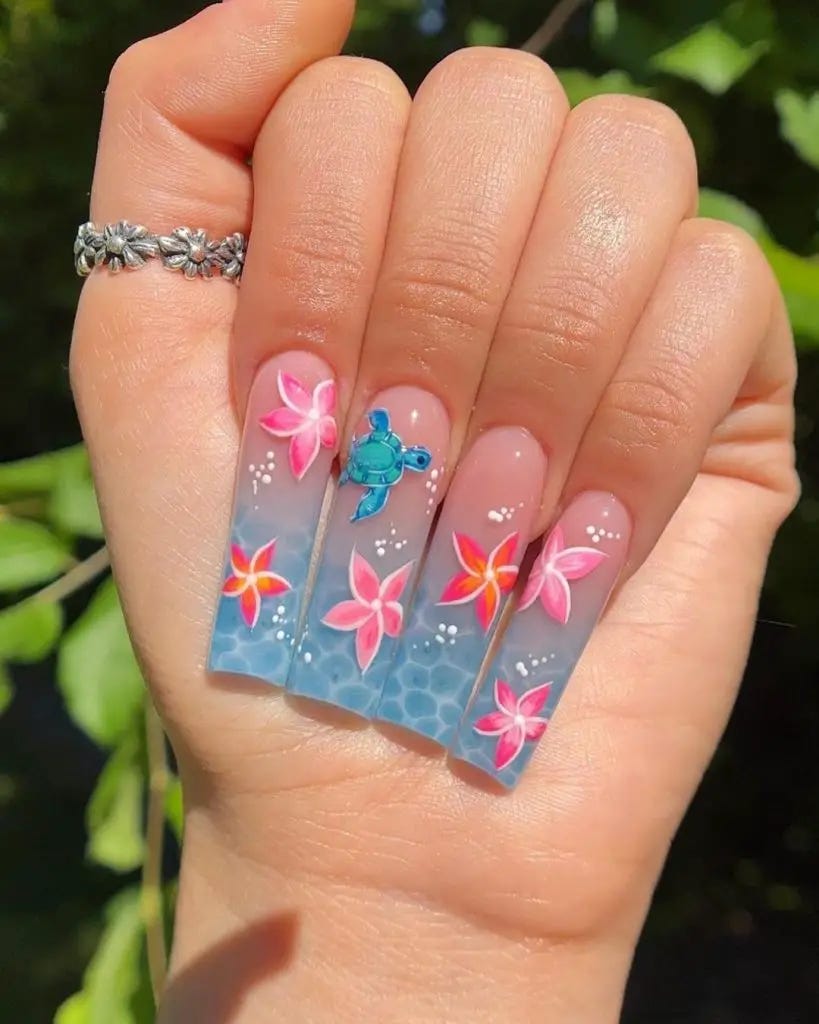
Tropical Waters and Floral Elegance
The design seen blends vibrant underwater elements with the delicate beauty of tropical flowers, achieving a harmonious balance. The clear blue base serves as the perfect backdrop for brightly colored floral decals and a tiny, detailed turtle charm that adds an endearing touch to the overall theme.
Consumables for Creating These Nails
- Clear Blue Polish: “Clear Waters” by Maybelline
- Floral Decals: Pre-designed from Etsy
- Tiny Turtle Charm: Custom made from Tiny Jewel Box
- Top Coat: UV Finish Clear Top Coat for maximum shine
- Recommendations: Position the decals and charm using tweezers for precision placement.
DIY Nail Design Instructions
- Paint your nails with a clear blue polish for a transparent, watery look.
- Apply floral decals and the turtle charm on the nails, arranging them aesthetically.
- Use a clear top coat to ensure the decals and charm are securely encapsulated.


0 Comments