Embrace a pop of vibrant hues this summer with short nails adorned in striking reds or chic black grunge designs. These fashionable styles offer a distinctive and daring aesthetic, perfect for either a nostalgic nod to the Y2K era or a playful Disney-inspired theme. Dive into the season with flair, as these trendy nail designs provide an enjoyable and budget-friendly avenue to showcase your individuality.
Advertisement
Electric Pink Energy
The radiant pink of electrifies the simple aesthetic of short summer nails. This hue is not just fun; it’s a statement, embracing 2024’s love for bright, bold colors. The matte finish adds a modern touch to the classic shade, making it a trendy choice for those celebrating life in vibrant color.

Advertisement
Essentials for Creation
- Base Coat: ORLY Rubberized Base.
- Pink Polish: Essie’s “Bachelorette Bash” for a vivid punch.
- Matte Top Coat: Essie Matte About You Finisher for that contemporary matte look.
Pro tip: Apply the color in even, thin coats and wait for each to dry completely before adding the matte top coat for a chic, simple yet unique finish.
DIY Directions
Prepare your nails with the base coat, then apply two coats of the pink polish, allowing them to dry between applications fully. Once dry, apply the matte top coat evenly for a summer nails short look that’s as cute as it is edgy.
Wild for Fuchsia
Advertisement
Is an adventure in print with a unique and trendy fuchsia animal pattern on short summer nails. This design is for those who carry a bit of the wild with them, merging fun and femininity in a cute and chic way. It’s a look that can take you from a summer break day out to a birthday night on the town.

Advertisement
Essentials for Creation
- Base Coat: Sally Hansen Hard as Nails.
- White Polish: OPI’s “Alpine Snow” for the base.
- Fuchsia Polish: “Forget Me Nots” by ORLY for the spots.
- Detailing Brush: For the animal print details.
- Top Coat: Seche Vite Dry Fast Top Coat.
Tip from the expert: When creating animal prints, let the brush dance with a light touch to create organic, unique shapes.
DIY Directions
Start with a base coat, followed by two coats of white polish. Once that’s set, dip your detailing brush in the fuchsia polish and create irregular spots. Don’t strive for perfection — irregularity is key. Finish with a top coat for a bright, playful look.
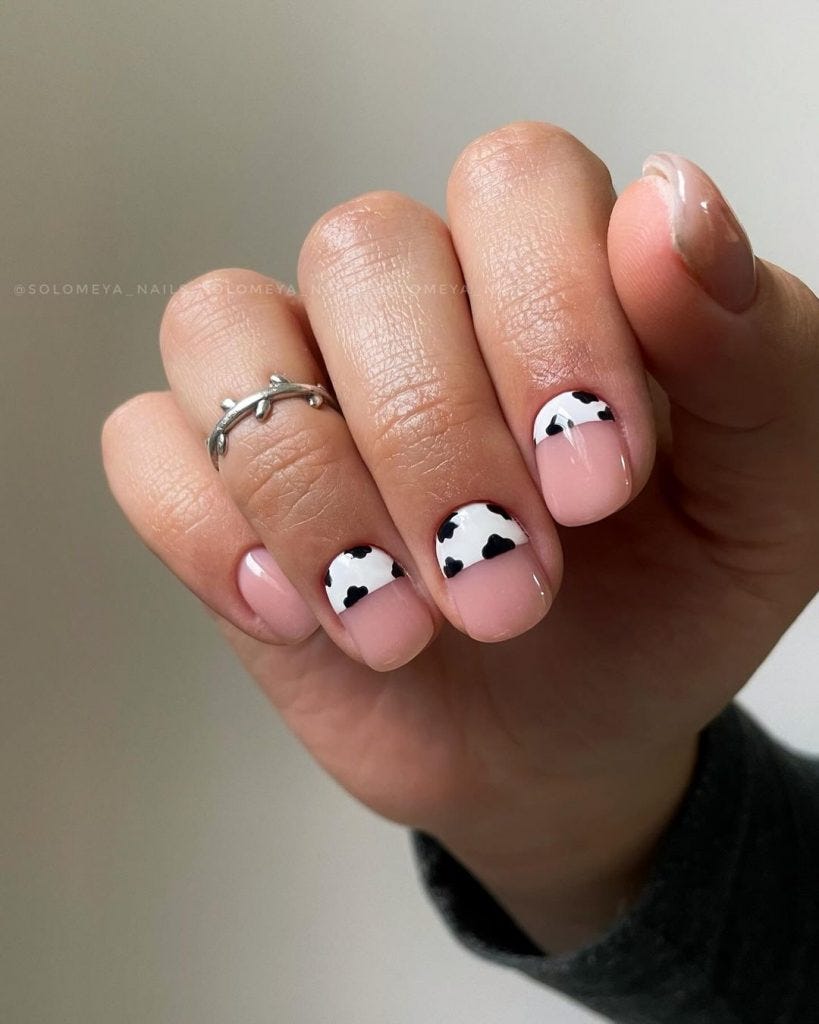
Moo-velous Mod
The playful cow print of showcases a modern take on a simple disney pattern with a chic black and white palette. It’s an easy, cute, and unique acrylic design that adds a touch of fun to the natural nail, proving that Y2K inspired art can be both simple and sophisticated.
Essentials for Creation
- Base Coat: Essie Here to Stay Base Coat.
- Pink Polish: “Muchi, Muchi” by Essie for the base.
- Black Polish: “Licorice” by Essie for the spots.
- Top Coat: INM Out the Door Top Coat for a quick-dry finish.
Insider’s hint: Use the tip of a bobby pin to dot on the black cow spots for a summer nails short design that’s easy to achieve at home.
DIY Directions
Prep your nails with the base coat and follow with a pale pink polish. When it’s dry, use a bobby pin or dotting tool to apply the black spots. There’s no right or wrong pattern here — embrace the randomness! Seal it all with a top coat for summer-lasting wear.
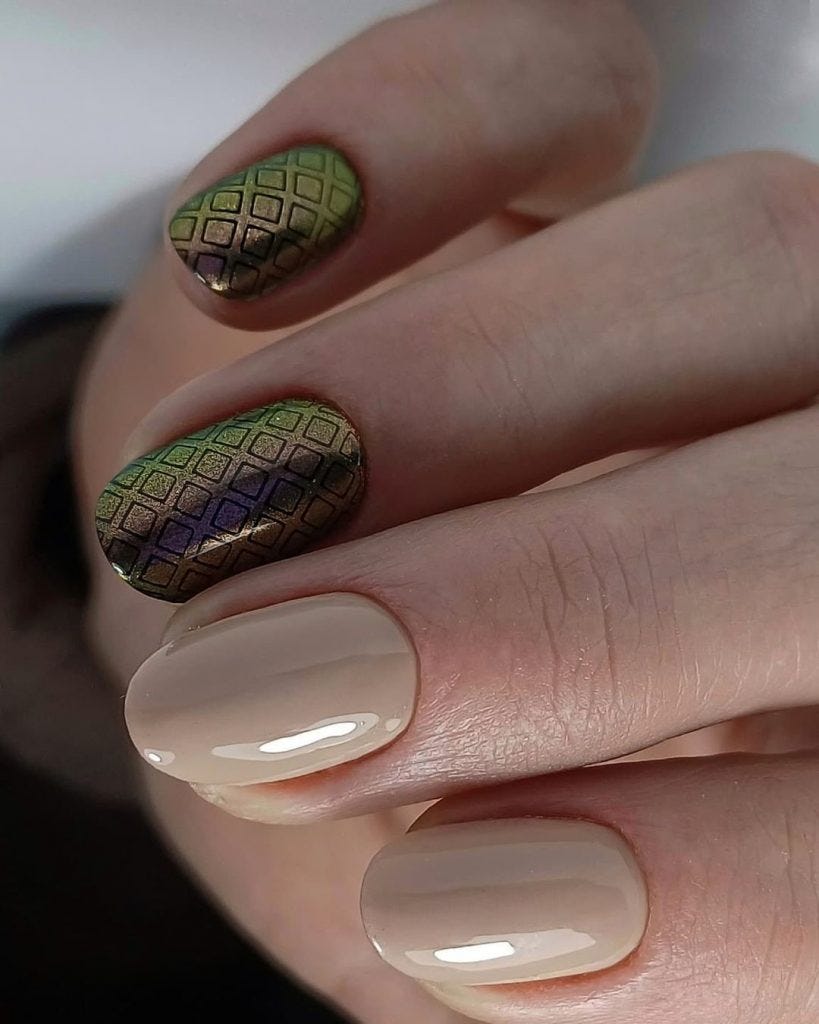
Enchanted Forest
Presents a lush sage green background sprinkled with golden flecks, reminiscent of a summer evening in an enchanted forest. This simple yet elegant design is surprisingly easy to achieve, and the added bling brings a magical flair, making it a cute, classy choice for any summer time event.

Advertisement
Essentials for Creation
- Base Coat: Butter London Nail Foundation Priming Basecoat.
- Sage Green Polish: “First Timer” by Essie for the base.
- Gold Glitter: OPI’s “Gold Key to the Kingdom” for the sparkle.
- Top Coat: Butter London Hardwear Shine UV Topcoat.
Expert advice: Sprinkle the glitter while the base polish is still tacky to ensure even distribution and a flat, shellac.
DIY Directions
Begin with your base coat to protect your natural nail. Then apply the sage green polish; while it’s still a bit wet, lightly dust your nails with the gold glitter. Use a fan brush for a more controlled application, creating a speckled effect. Finish with a slick top coat to seal in the sparkle and give your nails a gel-like shine, ready for any summer soirée.
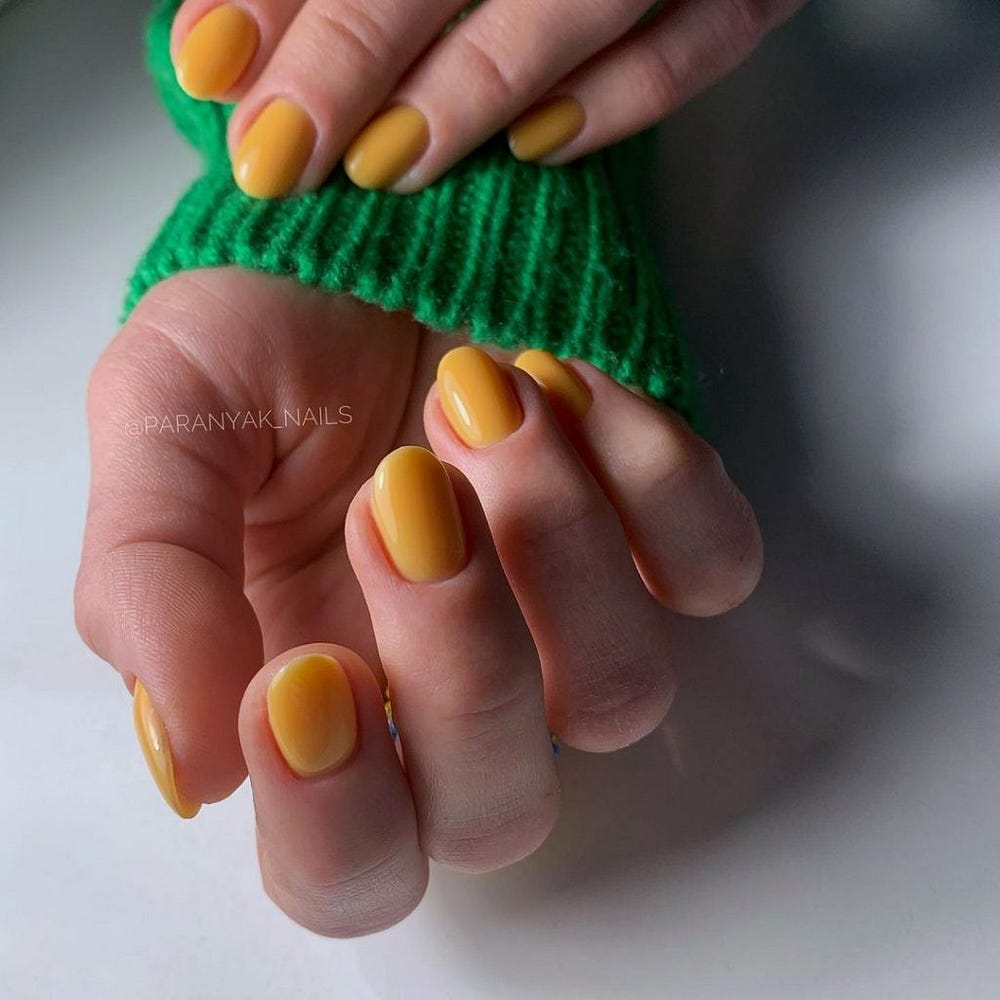
Sunny Delight
We see a delightful yellow that captures the very essence of summer. These short summer nails are like a burst of sunshine on your fingertips — bright, fun, and full of happiness. It’s a simple summer look that’s easy to pull off, yet it makes a trendy statement wherever you go.
Advertisement
Essentials for Creation
- Base Coat: Deborah Lippmann’s Hard Rock Nail Strengthening base and top coat.
- Yellow Polish: “Sun Bleached” by CND for that sunny hue.
- Top Coat: Seche Vite Dry Fast for a lasting glossy finish.
Expert tip: For a streak-free finish, apply thin layers of the yellow polish and let each layer dry completely before adding the next.
DIY Directions
Apply your base coat for nail protection, followed by a layer of the yellow polish. Patience is key — let each coat dry thoroughly to avoid smudging. Finish with a top coat for a bright, durable manicure that will last through your summer break adventures.
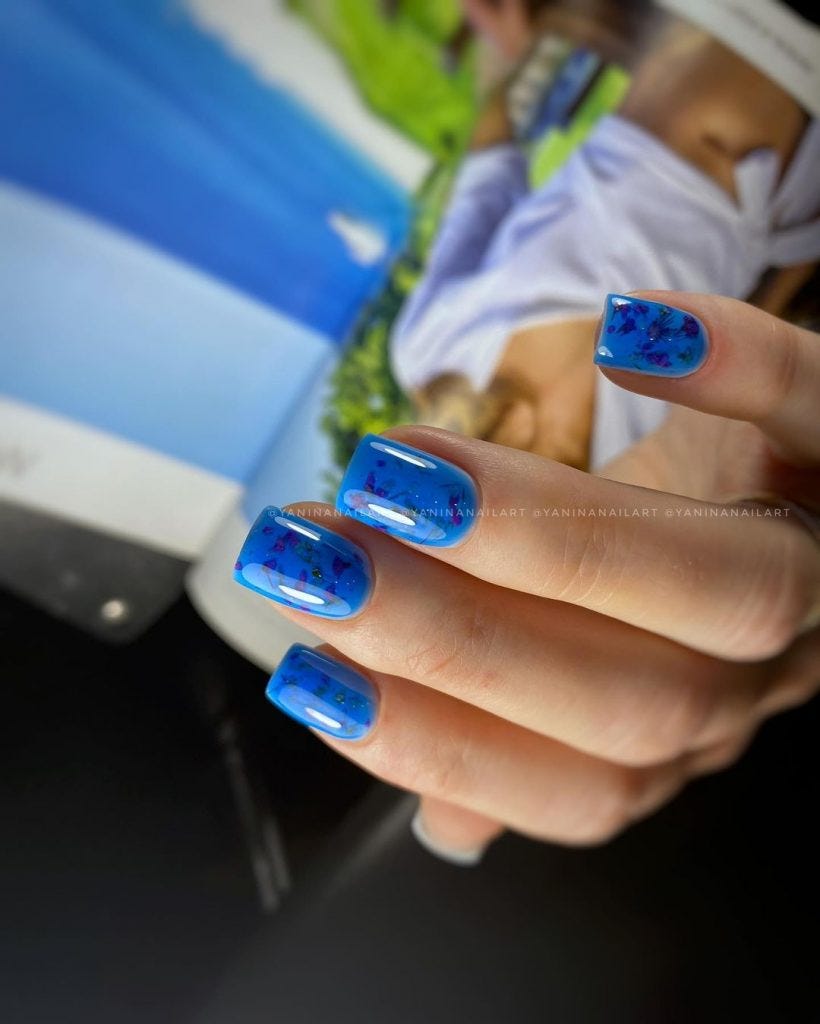
Oceanic Dreams
The vivid blue of reminds one of the clear summer sky or a deep ocean adventure, perfect for a summer nails short design. The added dried flowers encapsulate the natural beauty and freedom of the season, while the jelly-like finish is all about that 2024 nail trend of playful transparency and depth.
Advertisement
Essentials for Creation
- Base Coat: A solid start with Sally Hansen Double Duty Base & Top Coat.
- Blue Jelly Polish: Use a translucent blue like Zoya’s “Frida”.
- Dried Flowers: Available at craft stores or specialized nail art suppliers.
- Encapsulating Gel: Like IBD Builder Gel to seal in the botanicals.
- Top Coat: A glossy finish with Essie’s Gel.Setter for that gel look.
Expert tip: Positioning is everything with encapsulation. Use tweezers for precision placement of the dried flowers before sealing them in.
DIY Directions
After your base coat, apply a layer of blue jelly polish. Before it dries, place the dried flowers on the nail. Once you’re happy with the arrangement, apply the builder gel to encapsulate the design. Cure under a lamp if necessary and finish with a top coat for a shellac-like gloss.
Gradient Glamour
Is all about the ombre effect, combining pink and sparkling glitter to create a simple summer gradient that’s fun, cute, and chic. This design is ideal for those who love a hint of bling while maintaining a natural and elegant look.

Advertisement
Essentials for Creation
- Base Coat: Start with ORLY Bonder Rubberized Basecoat.
- Pink Polish: A gradient base with OPI’s “Mod About You”.
- Pink Glitter: Add some sparkle with OPI’s “Princesses Rule!”.
- Sponge: To dab and blend the gradient.
- Top Coat: Seal it with INM Out The Door Top Coat for lasting wear.
Pro tip: Apply the polish to the sponge first, then dab onto the nail for a smooth ombre transition.
DIY Directions
Apply the base coat, then paint your nails with the light pink. Take your sponge, apply both colors side by side, and then dab onto the nail, blending the two shades together. While the polish is still tacky, add a touch of glitter where the colors meet. Finish with a top coat for a durable, summer-ready look.
Checkerboard Chic
Pictured here is a trendy plaid pattern that hasn’t left the global style scene. It’s a playful yet stylish choice that showcases unique acrylic craftsmanship, combining neutral tones with metallic accents for a summer look that’s both fun and sophisticated.
Essentials for Creation
- Base Coat: A layer of CND Stickey Base Coat.
- Neutral Polish: “Topless & Barefoot” by Essie.
- Metallic Polishes: Alternating squares with OPI’s “Love.Angel.Music.Baby” and “Just BeClaus”.
- Detailing Brush: For precise lines and squares.
- Top Coat: Finish with Seche Vite Dry Fast Top Coat.
Expert tip: Use striping tape to create even, symmetrical squares for that perfect checkerboard.


0 Comments